How to Make Slip Clay: Easy Steps for Perfect Results
To make slip clay, mix clay and water until it reaches a smooth, pourable consistency. Slip clay is a liquid clay mixture that is commonly used in pottery and ceramics for casting, decorating, and joining clay pieces together.
It can be easily prepared by combining equal parts of clay and water and stirring until they are well blended. Slip clay is versatile and can be customized by adding colorants, such as oxides or stains, to achieve the desired finish.
It is important to note that slip clay should be used immediately after preparation, as it has a tendency to dry out quickly. By following these simple steps, you can create slip clay to enhance your pottery projects.
What Is Slip Clay?
Slip clay, a key component in pottery, can be easily made by mixing clay with water to achieve the desired consistency. Simply follow these steps to create slip clay for your pottery projects.
The Composition And Characteristics Of Slip Clay
Slip clay is an essential component in the world of ceramics. It is a liquid form of clay that can be applied to the surface of ceramic pieces before they are fired in a kiln. Slip clay is often used to add color, texture, and even additional layers to the finished piece.
In this section, we will explore the composition and characteristics of slip clay, as well as the importance it holds in the ceramics process.
Composition
- Slip clay is primarily made up of clay particles suspended in water, creating a thick liquid consistency.
- Various types of clay can be used to make slip clay, including porcelain, earthenware, and stoneware. Each type of clay has its own unique qualities and can contribute to different effects in the final product.
- Other ingredients such as fluxes and colorants can be added to the slip clay to achieve desired effects.
Characteristics
- Slip clay has a high water content, which makes it easy to apply to the surface of ceramics. The excess water evaporates during the firing process, leaving behind a smooth and even layer of clay on the surface.
- It has a low shrinkage rate compared to other clay forms, ensuring that the applied slip clay does not crack or warp during drying and firing.
- Slip clay offers excellent bonding properties, allowing it to adhere well to the ceramic surface and creating a strong connection between the layers of clay.
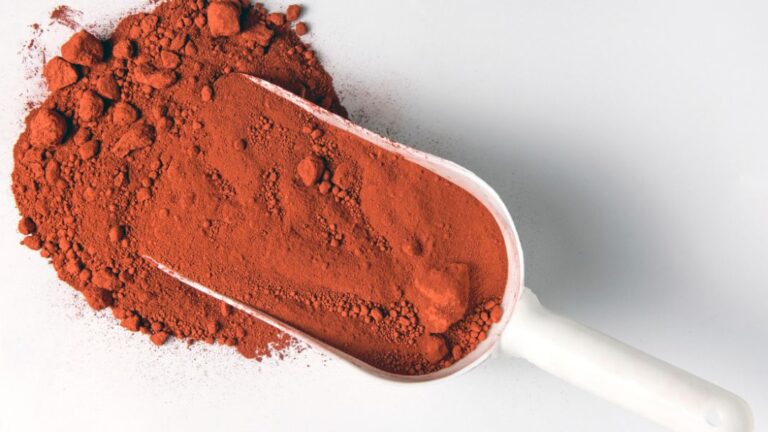
- The color and texture of slip clay can be adjusted by adding different oxides, pigments, or stains, providing endless possibilities for creativity and experimentation.
Understanding the importance of slip clay in ceramics is crucial for any pottery enthusiast or artist. It offers a wide range of artistic possibilities, adding depth, color, and texture to ceramic pieces. Whether it is used to enhance the aesthetics of a sculpture or to create intricate designs on a functional item, slip clay plays a vital role in the world of ceramics.

The Benefits Of Making Your Own Slip Clay
Making your own slip clay offers a range of benefits that go beyond just saving money. Here are some key advantages to consider:
Cost-Effective And Sustainable Solution
- By making your own slip clay, you can significantly reduce costs compared to purchasing pre-made clay. This is especially beneficial for artists or potters who require large quantities of slip clay for their projects.
- Making slip clay from scratch also enables you to incorporate more sustainable practices into your creative process. You have control over the materials used and can prioritize eco-friendly options, such as using locally sourced ingredients or reusing clay scraps.
Customizing Slip Clay For Specific Projects
- One of the major advantages of making your own slip clay is the ability to customize it according to your specific needs. This allows for greater control over the texture, opacity, and color of the slip clay.
- Tailoring the slip clay to match your project requirements can result in more cohesive and visually appealing final pieces. Whether you need a slip with high plasticity for intricate detailing or a slip with low shrinkage for larger forms, you have the flexibility to create the perfect consistency.
Enhancing Artistic Expression And Experimentation
- Making your own slip clay encourages artistic exploration and experimentation. You can easily adjust the slip’s properties to achieve different effects, such as cracked surfaces, marbling, or subtle shading.
- Artists can also incorporate unique materials into their slip clay, such as iron oxide, stains, or even recycled glass, to create stunning visual effects. This freedom to innovate allows for more personalized and distinctive artwork.
Improved Bond And Compatibility
- When you make your own slip clay, you have full control over the ingredients, ensuring compatibility with your base clay. This leads to better bonding and reduced risk of cracking or flaking once the slip is applied.
- Additionally, by using the same clay body for both the base and slip clay, you can avoid issues of differential shrinkage between layers, resulting in more durable and long-lasting pieces.
Greater Appreciation Of The Ceramic Process
- Crafting your own slip clay fosters a deeper understanding and appreciation of the ceramic process. Exploring the alchemy of mixing different materials, experimenting with firing temperatures, and observing the transformation from raw ingredients to finished art helps you connect with your craft on a more profound level.
- By immersing yourself in the creation of slip clay, you gain insights into its chemistry, colorants, and firing behaviors, ultimately enabling you to evolve as an informed and skilled ceramic artist.
Expand Creative Possibilities
- Making your own slip clay broadens the range of creative possibilities available to you. You are not limited to the commercial options or standardized colors offered by stores. Instead, you can push boundaries and create custom slip clay variations that align perfectly with your artistic vision.
- Furthermore, homemade slip clay can be used for various techniques like slip trailing, slip casting, or even as a glaze. This versatility allows you to explore different surface treatments and experiment with diverse ceramic processes.
So why settle for store-bought slip clay when you can enjoy all the benefits of DIY slip clay? Take the plunge and unlock endless possibilities for your ceramic journey.
Gathering The Ingredients
Discover how to make slip clay with this easy-to-follow guide. Gather the essential ingredients and learn the step-by-step process to create your own slip clay for pottery projects.
Choosing The Right Clay Body
When it comes to making slip clay, the first step is to choose the right clay body. This is essential as different clay bodies have varying properties that make them suitable for different purposes. Here are the factors to consider when selecting the clay body for your slip clay:
- Plasticity: Opt for a clay body that has good plasticity, meaning it can be easily molded and shaped without cracking or breaking.
- Absorption: Consider the absorption rate of the clay, which affects the consistency of your slip clay. Higher absorption clay will require more water to reach the desired consistency.
- Particle Size: Look for a clay body with fine particles, as this will result in a smoother slip clay that is easier to work with.
- Color: Depending on your preference, choose a clay body that matches the desired color of your slip clay.
Other Materials Needed For Slip Clay
In addition to the clay body, there are a few other materials you’ll need to gather to make slip clay. These materials play a crucial role in achieving the right consistency and functionality of your slip clay. Here’s what you’ll need:
- Water: The primary liquid component for slip clay. Use clean water and adjust the amount depending on the desired thickness.
- Deflocculant: A chemical additive used to reduce the clay particles’ tendency to clump together. Sodium silicate and sodium carbonate are commonly used deflocculants.
- Sieve: A fine mesh sieve or screen is necessary to remove impurities and larger particles from your clay body.
- Mixing Container: Use a non-reactive container, such as a plastic bucket or stainless steel vessel, to mix your slip clay.
- Mixing Tools: Use a sturdy stick or an electric mixer to thoroughly combine the clay body, water, and deflocculant.
Remember that the success of your slip clay depends on the quality of the materials you use and the appropriate proportions. With the right ingredients at hand, you’re ready to move on to the next step in making slip clay.
Preparing The Workspace
Learn how to make slip clay by preparing your workspace properly. Follow these simple steps to create a suitable environment for slip clay making.
Creating A Clean And Organized Environment
To ensure a successful slip clay-making process, it is crucial to prepare a clean and organized workspace. This will not only enhance efficiency but also contribute to a more enjoyable and stress-free experience. Follow these steps to create an optimal environment:
- Clear the clutter: Begin by tidying up the workspace and removing any unnecessary items. Clear the area of any debris, tools, or equipment that could hinder your progress or cause accidents.
- Clean surfaces: Thoroughly clean and wipe down all surfaces, such as tables, countertops, and shelves, to create a hygienic and dust-free workspace. Consider using a mild cleaning solution and a clean cloth for this task.
- Provide adequate lighting: Ensure that the workspace is well-lit to eliminate shadows and allow for better visibility. Natural light is ideal, but if that’s not possible, make sure to have sufficient artificial lighting in place.
- Maintain good ventilation: Slip clay can emit dust and fumes, so it’s important to have proper ventilation in the workspace. Open windows or use fans to circulate the air and prevent any potential health hazards.
- Organize materials and supplies: Sort and arrange all the necessary materials and supplies before starting with slip clay production. This includes clay, water, tools, molds, and any additives or pigments you may require.
- Label containers: Clearly label all the containers holding different types of clay or other materials. This will help you quickly and accurately identify the contents as you work, saving time and preventing any confusion.
- Implement safety measures: Ensure that safety equipment, such as gloves, goggles, and aprons, are readily available and in good condition. Prioritize your safety and take necessary precautions to protect yourself during the slip clay-making process.
- Create designated work areas: Allocate specific areas for different tasks, such as mixing clay, molding, and drying. This will help maintain an organized workflow and prevent cross-contamination of materials.
- Keep tools within reach: Arrange your tools and equipment in an easily accessible manner. Consider using tool organizers or racks to keep everything organized and within arm’s reach to avoid unnecessary disruptions or delays.
- Maintain cleanliness throughout: As you work, regularly clean up any spills or excess materials. Keep the workspace tidy and organized at all times, disposing of waste properly and ensuring a clutter-free environment.
By following these guidelines and creating a clean and organized workspace, you will set the stage for a smooth and efficient slip clay-making process. With everything in order, you can now move on to the next step of setting up the necessary tools and equipment.
Mixing The Clay
Learn how to make slip clay with our step-by-step guide, from selecting the right clay to mixing it to the perfect consistency for your pottery projects.
Clay slip, also known as liquid clay, is a versatile material used in ceramics, pottery, and sculpture. It is created by mixing clay and water in the correct ratio to achieve the desired consistency. In this section, we will explore the process of mixing the clay for slip-making and the important considerations to ensure a successful outcome.
Measuring And Weighing The Clay And Water
When mixing clay slip, it is crucial to accurately measure and weigh the clay and water to maintain the desired consistency and properties. Here are the steps to follow:
- Measure the clay: Begin by measuring the desired amount of clay needed for your project. Use a scale to determine the weight of the clay, ensuring precision.
- Weigh the water: Similarly, measure the amount of water required for the slip. Again, use a scale to obtain the accurate weight of the water.
- Determine the ratio: Once you have the measurements, calculate the ratio of clay to water. This ratio varies depending on the specific project and the desired thickness of the slip. Common ratios range from 1 part clay to 1 part water for a thinner slip, to 1 part clay to 2 parts water for a thicker slip.
Combining The Ingredients In The Correct Ratio
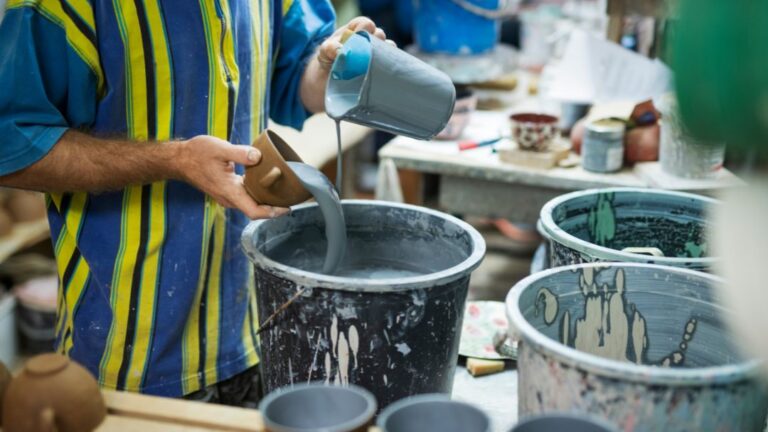
After weighing and measuring the clay and water, it’s time to combine the two ingredients to create the slip. Here’s how you can achieve a proper mixture:
- Prepare a mixing container: Choose a suitable container that is large enough to accommodate the clay and water. A bucket or a large mixing bowl works well for this purpose.
- Add water first: Start by pouring the measured water into the mixing container. This ensures better dispersion of the clay particles and promotes thorough homogenization.
- Gradually add the clay: Next, slowly add the clay to the water while stirring continuously. This gradual addition helps prevent the formation of lumps and ensures a smooth consistency.
- Mix thoroughly: Continue stirring the mixture until the clay is well incorporated into the water. Use a hand whisk or an electric mixer for best results. Ensure there are no dry clay pockets or visible clumps in the mixture.
- Check the consistency: Once the clay is fully mixed, assess the consistency of the slip. It should have a fluid texture but still maintain enough thickness to adhere to surfaces. Adjust the consistency by adding more water or clay as needed, following the established ratio.
By carefully measuring and weighing the clay and water, and combining them in the correct ratio, you can create slip clay with the desired properties for your ceramics or pottery projects. Remember to maintain cleanliness during the mixing process to avoid contamination and always follow specific instructions provided by clay manufacturers for optimal results.
Adjusting The Consistency
Learn the art of adjusting the consistency of slip clay with these simple steps. Achieve the perfect texture for your pottery projects by following these guidelines.
Testing The Slip Clay’S Thickness
To achieve the perfect consistency for slip clay, it is important to test its thickness and make adjustments accordingly. Here are some techniques for thinning or thickening slip clay:
- Water content: Gradually add water to the slip clay while continuously stirring. Test the consistency by dipping your finger or a tool into the mixture and observing how it flows. If it is too thick, add more water; if it is too thin, add more clay.
- Adding clay: If the slip clay is too thin, you can thicken it by gradually incorporating more clay into the mixture. Break off small pieces of clay and knead them into the slip, ensuring thorough mixing between additions.
- Blending or straining: For slip clay that is too thick, blending or straining can be helpful. Use a blender to combine the slip clay with water until the desired consistency is achieved. Alternatively, strain the slip clay through a fine-mesh sieve to remove any lumps or clumps, resulting in a smoother texture.
- Adjusting additives: Slip clay often includes additives like deflocculants or suspending agents to modify its viscosity. Follow the manufacturer’s instructions to determine the appropriate amount of these additives to achieve the desired consistency. Be cautious when adjusting additives, as excessive amounts can negatively impact the final result.
Remember, the consistency of slip clay is crucial for its application in ceramics. By testing and adjusting its thickness, you can ensure optimal results for your projects. Experiment with these techniques until you find the perfect consistency for your slip clay.
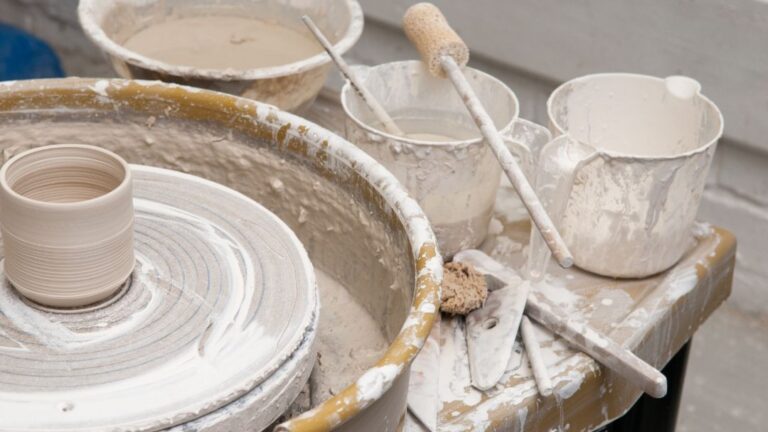
Sieving And Filtering
To make slip clay, sieve and filter your clay through a fine mesh to remove impurities and create a smooth consistency. This process ensures that your slip clay is ready to be used for pottery and ceramics.
Removing Impurities And Ensuring A Smooth Texture
As you prepare to sieve and filter the slip clay, it’s essential to remove impurities from the mixture and achieve a smooth texture. This step is crucial as it ensures the slip clay is of high quality for pottery-making. Here’s how to effectively remove impurities and achieve the desired smoothness:
- Sieve the slip clay: Start by pouring the slip clay through a fine mesh sieve. This process helps remove larger impurities such as rocks or plant matter. Gently tap the sieve against a surface to encourage the slip clay to pass through, leaving the impurities behind.
- Use a cheesecloth: To further filter the slip clay and eliminate smaller particles, consider using a cheesecloth. Lay the cheesecloth over a container, ensuring it is tightly secured. Slowly pour the sieved slip clay onto the cheesecloth and allow gravity to pull the slip clay through while trapping any remaining impurities on the cloth.
- Settle and decant: After sieving and filtering, allow the slip clay to settle in a container. This process helps any remaining impurities to sink to the bottom. Once the clay has settled, carefully pour off the clean water from the top, known as “decanting”. This technique assists in separating the purified slip clay from any leftover impurities and excess water.
By following these steps, you can remove impurities and achieve a smooth texture in your slip clay, ensuring it is ready for use in your pottery projects. Remember to adjust the sieving and filtering methods based on the specific clay type and your desired clay consistency.
Storing And Aging The Slip Clay
Once you have made your slip clay, it is essential to store and age it properly for optimal results. The process of storing and aging allows the slip clay to develop its desired consistency and improve its working properties. Here are some guidelines and techniques to ensure you are storing and aging your slip clay effectively:
Proper Containers And Storage Techniques
- Choose the right container: Opt for nonporous containers such as glass, plastic, or stainless steel containers to store your slip clay. Avoid porous materials like wood or cardboard, as they can absorb moisture and alter the slip clay’s composition.
- Seal it tightly: To prevent moisture loss and maintain the slip clay’s consistency, ensure you have airtight lids or covers for your storage containers. This will help preserve the slip clay’s moisture content and prevent it from drying out.
- Label your containers: To avoid confusion and keep track of your slip clay batches, label each container with the date, recipe, or any other relevant information. This will help you identify and use the slip clay as per your requirements.
- Store in a cool and dark place: Slip clay should be stored in a cool and dark area to avoid exposure to direct sunlight or extreme temperature fluctuations. Excessive heat or light can impact the aging process and the quality of the slip clay.
Allowing The Slip Clay To Mature For Better Results
- Set aside a dedicated aging space: Designate an area where your slip clay can age undisturbed. This space should be well-ventilated to allow for proper air circulation and contribute to the aging process.
- Give it time: Slip clay needs time to mature, so let it sit for at least a week before you start using it. This waiting period allows the clay particles to hydrate fully and settle, resulting in a more stable and workable slip clay.
- Regularly check moisture levels: While aging, periodically check the moisture content of the slip clay. If you find that it is becoming too thick or drying out, add water in small increments and mix thoroughly until you achieve the desired consistency.
- Consistency matters: The longer you allow your slip clay to mature, the smoother and more consistent it will become. Aim for a slip clay consistency that is easy to stir but still flows smoothly without being overly runny.
- Test before use: Before incorporating the slip clay into your projects, always perform a test to ensure it meets your desired standards. This can involve checking its viscosity, applying it to a small piece of clay, or conducting a slip-trailing test to evaluate its performance.
Remember, a well-aged and properly stored slip clay can greatly enhance your ceramic creations. Take the time to store and age it correctly, allowing it to reach its full potential and contribute to the success of your ceramic projects.
Tips For Perfect Slip Clay
When it comes to making slip clay, there are a few tips and tricks that can help you achieve the perfect results. From adding colorants and additives for unique effects to experimenting with different clay bodies for varied textures, these techniques can take your slip clay to the next level.
Here are some tips to consider:
Adding Colorants And Additives For Unique Effects
- Experiment with oxides and stains: Oxides and stains can add vibrant colors to your slip clay. Try different combinations and quantities to achieve the desired effect.
- Incorporate mason stains: Mason stains are formulated specifically for pottery and can provide intense, stable colors to your slip clay.
- Use ceramic stains: Ceramic stains offer a wide range of colors and can be a great option for achieving unique and striking effects.
- Try adding mica or metallic oxides: Mica can add a subtle shimmer to your slip clay, while metallic oxides can create interesting metallic finishes.
Experimenting with different clay bodies for varied textures:
- Explore porcelain slip clay: Porcelain slip clay can provide a smooth and translucent finish, ideal for delicate and refined pieces.
- Consider stoneware slip clay: Stoneware slip clay offers a more robust and rustic feel, great for creating textured and earthy surfaces.
- Mix clays to create custom combinations: You can experiment with mixing different clay bodies to achieve unique textures and characteristics in your slip clay.
- Try adding grog or sand: Adding grog or sand to your slip clay can enhance its texture and provide an interesting tactile experience.
By following these tips, you can elevate your slip clay creations and achieve stunning results. Remember to experiment, have fun, and let your creativity guide you as you explore the possibilities of slip clay.
Common Slip Clay Issues
Discover the common slip clay issues and learn how to make slip clay efficiently. Master the art of handling slip clay with these helpful tips and techniques.
Lumps and clumps in slip clay can make it challenging to achieve a smooth and even application. Here’s how you can tackle this issue:
- Sieve the clay: Use a fine-mesh sieve to remove any existing lumps or foreign particles in the slip clay. This ensures a smoother consistency for your clay mixture.
- Mix it well: Once you have sieved the slip clay, mix it thoroughly using a whisk or an electric mixer. This helps break up any remaining lumps and ensures a homogeneous texture.
- Add water gradually: If your slip clay still contains lumps, try adding water gradually while continuously stirring. This method helps to disperse the clay particles and smoothen the mixture.
- Re-sieve if necessary: In case you still notice lumps after mixing, re-sieve the slip clay to remove any newly formed clumps. This step ensures a lump-free mixture for your pottery or ceramics projects.
Keeping your slip clay moist is crucial for its workability. Follow these tips to prevent it from drying out:
- Cover the container: Always cover the container holding the slip clay to minimize evaporation. Use a lid or plastic wrap to create an airtight seal, allowing it to retain moisture.
- Store in a cool place: Place the container in a cool and shaded area. Direct sunlight or heat can cause the slip clay to dry out quickly.
- Use a damp cloth: If you notice the slip clay starting to dry out, place a damp cloth over the container. The cloth acts as a barrier, preventing excessive moisture loss.
- Spray with water: If the slip clay has already dried out slightly, you can revive it by spraying a mist of water over the surface. Make sure it is not too wet; a light misting is sufficient.
Remember, keeping your slip clay smooth and moist is essential for achieving desired results in your pottery or ceramics projects. By addressing lumps and clumps effectively and preventing drying out, you can enhance your creative process and produce high-quality pieces.
Troubleshooting Slip Clay Problems
Discover effective troubleshooting techniques for slip clay problems. Learn how to make slip clay in simple steps for successful pottery projects.
Solutions For Cracking Or Shrinking Slip Clay
When working with slip clay, it’s not uncommon to encounter problems such as cracking or shrinking. These issues can be frustrating, but fear not! We’ve got some solutions to help you troubleshoot and fix these common slip clay problems. Check them out:
- Ensure proper proportions: Make sure you are using the right amount of water and clay when preparing your slip. Using too much or too little of either can cause cracking or shrinking. Aim for a consistent and balanced mixture.
- Slow drying process: Rapid drying can contribute to cracking in slip clay. To prevent this, try allowing the clay to dry slowly. Cover the piece with a plastic bag or cloth to slow down the drying process. This helps to maintain the moisture content and reduce the likelihood of cracks.
- Proper application technique: The way you apply the slip clay can also play a role in its performance. Apply the slip evenly and with enough thickness to provide a solid layer. Avoid applying it too thinly, as this can lead to cracking. Experiment with different application techniques, such as pouring, brushing, or spraying, to find the most effective method for your project.
- Avoid overworking the clay: Overworking the slip clay, especially during shaping or molding, can cause stress and cracking. Try to handle the clay gently and avoid excessive manipulation. Be mindful of the clay’s limits and give it time to settle and dry properly.
- Slow drying environment: Creating a slow drying environment can help minimize cracking or shrinking. You can achieve this by placing the clay in a controlled environment with stable humidity levels, away from direct sunlight or drafts. This allows the clay to dry at a consistent pace, reducing the chances of cracking.
Remember, troubleshooting slip clay problems requires patience and experimentation. By following these solutions, you can tackle issues like cracking or shrinking and achieve the desired results in your clay projects.
Conclusion
To conclude, making slip clay is a rewarding and creative process that can enhance your pottery skills. By following the simple steps outlined in this blog post, you can produce high-quality slip clay that will add depth and character to your ceramic pieces.
Remember to carefully choose your clay body, mix your ingredients thoroughly, and experiment with different colorants to achieve your desired results. It is also important to test your slip clay on a small scale before committing to larger projects. With practice and patience, you will become more proficient in making slip clay and discover new techniques to enhance your pottery creations.
So, gather your materials, set up your workspace, and let your imagination soar as you embark on your slip clay journey. Happy potting!