How to Make White Clay: Easy and Effective DIY Techniques
To make white clay, mix equal parts of cornstarch and white glue until you have a smooth and moldable consistency. White clay is simple to make and can be used for various crafts and projects.
White clay, a versatile material used for crafts and projects, can be easily made by combining equal parts of cornstarch and white glue to achieve a smooth and moldable consistency. This straightforward process allows for endless creative possibilities and ensures that you have a readily available supply of white clay for your artistic endeavors.
Whether you are creating sculptures, jewelry, or decorative objects, making your own white clay enables you to customize its properties and use it in various applications. We will explore the step-by-step process of creating white clay and provide useful tips for working with it effectively. Let’s dive in and unleash your creativity with white clay!
Common Materials And Tools Required
To make white clay, you will need common materials such as cornstarch, baking soda, water, a saucepan, and a stove. Mix the ingredients together, heat them in the saucepan until the mixture thickens, then allow it to cool before using it for your crafting projects.
White clay is a versatile and easy-to-work-with material that can be used for a variety of crafting projects. Whether you are creating beautiful pottery or making intricate sculptures, white clay is a popular choice due to its smooth texture and ability to hold intricate details.
In this section, we will explore the common materials and tools required to make white clay.
Clay Powder
- Clay powder is the main ingredient for making white clay. It is readily available in craft stores or online.
- This powder is usually a mix of various types of clay, such as kaolin clay or porcelain clay.
- Make sure to choose a high-quality clay powder for the best results.
Cornstarch
- Cornstarch acts as a binder and helps to give the clay a smooth and pliable texture.
- It also helps to reduce the stickiness of the clay, making it easier to work with.
- Be sure to use food-grade cornstarch to ensure the safety of your craft projects.
White Glue
- White glue is an essential ingredient in making white clay as it helps to hold the clay together and prevents it from cracking.
- It also gives the finished product a smooth and polished appearance.
- Make sure to use a white craft glue that dries clear for the best results.
Creating white clay requires a few additional tools to help with the mixing and shaping process. Here are some essential tools you will need:
Mixing Bowl
- A mixing bowl is essential for combining the clay powder, cornstarch, and white glue.
- Choose a bowl that is large enough to comfortably hold all the ingredients without overflowing.
Measuring Cups And Spoons
- Accurate measurements are crucial when making white clay.
- Use measuring cups and spoons to ensure the right proportions of clay powder, cornstarch, and white glue.
Spoon Or Spatula
- A spoon or spatula will help you mix the ingredients together thoroughly.
- Make sure to choose a utensil that is suitable for stirring and scraping the sides of the bowl.
Plastic Wrap Or Airtight Container
- After making white clay, it is important to store it properly to prevent it from drying out.
- Wrap the clay in plastic wrap or place it in an airtight container to keep it fresh and pliable.
With these common materials and tools, you are now ready to embark on your white clay crafting journey. Experiment with different techniques and let your creativity soar as you mold and shape this versatile material into beautiful creations.

Mixing The Ingredients
Learn how to make white clay by mixing the ingredients in a simple and easy process. Create your own clay for various crafting projects and unleash your creativity.
Proportions Of Clay Powder, Cornstarch, And White Glue
- Mix 1 cup of clay powder with 1/4 cup of cornstarch in the bowl.
- Add 1/2 cup of white glue to the mixture.
- Stir the ingredients together until they are well combined.
- If the mixture is too dry, add a bit more white glue. If it’s too sticky, add more clay powder.
Using A Mixing Bowl Or Container
- Choose a mixing bowl or container that is large enough to hold all of the ingredients and allow room for stirring.
- Make sure the bowl is clean and dry before you begin.
Step-By-Step Instructions For Achieving The Right Consistency
- Start by pouring the clay powder and cornstarch into the mixing bowl.
- Use a spoon or your hands to mix the powders together until they are evenly distributed.
- Slowly pour in the white glue while stirring the mixture continuously.
- Keep stirring until the ingredients start to come together and form a dough-like consistency.
- If the mixture is too dry, add a small amount of white glue and continue stirring.
- If the mixture is too sticky, add a little more clay powder and mix well.
- Repeat the process until you achieve the desired consistency.
- Once the clay is well mixed and has the right texture, it’s ready to use for your crafting or sculpting projects.
Remember to adjust the proportions of the ingredients as needed to achieve the desired consistency. Mixing the ingredients properly will ensure that your white clay is easy to work with and produces beautiful results. Get creative and enjoy the process of making your own clay!
Adding Color And Fragrance (Optional)
To enhance the aesthetic appeal of your homemade white clay, you can consider adding color and fragrance. By incorporating these optional elements, your white clay creations will not only look visually stunning but also emit a pleasant scent.
Choosing Suitable Coloring Agents
When it comes to selecting coloring agents for your white clay, there are several options to consider. Here are some suitable choices:
- Food coloring: Easily accessible and available in a wide range of colors, food coloring is an excellent choice for adding vibrant hues to your white clay.
- Acrylic paints: If you’re looking for a more intense and opaque color, acrylic paints can be mixed directly into your clay. Just a few drops will go a long way.
- Natural colorants: For those who prefer a more organic approach, natural colorants such as spices, herbs, and fruit powders can be used to create soft and earthy hues.
- Mica powders: Mica powders are highly pigmented and can give your white clay a metallic or shimmering finish. They come in a variety of colors and are ideal for creating a unique touch.
Mixing and kneading in the color:
Once you’ve chosen your desired coloring agent, follow these steps to incorporate it into your white clay:
- Start by portioning out the amount of white clay you’ll need for your project.
- Flatten the clay into a disc shape and create a well in the center.
- Add a small amount of the coloring agent into the well, using a toothpick or spatula.
- Begin folding the clay over itself, trapping the coloring agent inside.
- Knead the clay until the color is evenly distributed and there are no streaks or patches remaining.
- If the color is not vibrant enough, add a bit more coloring agent and continue kneading until the desired shade is achieved.
Incorporating fragrance for a personalized touch:
Adding fragrance to your white clay can enhance the sensory experience of your crafts. Here are a few options for incorporating fragrance:
- Essential oils: Choose your favorite essential oils and add a few drops to your white clay. Mix and knead thoroughly to distribute the fragrance evenly.
- Perfume or cologne: Spritz a small amount of your preferred scent onto the clay and knead it in until the fragrance is well-blended.
- Floral powders: Use dried flower petals or floral powders to infuse your white clay with natural fragrances. Simply mix them into the clay during the kneading process.
Remember to start with a small amount of fragrance and gradually add more to achieve your desired level of scent.
Now that you know how to choose suitable coloring agents, mix and knead them into your clay, and incorporate fragrance, you can take your white clay projects to the next level. Get ready to create stunning crafts that are visually and aromatically appealing.
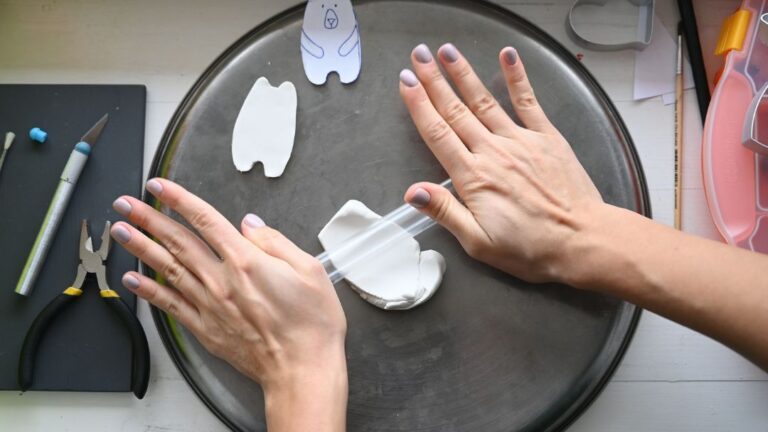
Shaping And Sculpting Techniques
Discover the intricate art of shaping and sculpting with white clay. Unleash your creativity and learn how to create stunning clay masterpieces with these easy-to-follow techniques.
White clay, also known as porcelain clay, is a versatile material that can be shaped and sculpted into various forms. Whether you are a beginner or have some experience with clay work, there are different techniques you can use to create stunning pieces.
In this section, we will explore these techniques and provide tips to help you master the art of shaping and sculpting with white clay.
Different Techniques For Working With White Clay
Hand-building techniques:
- Coil method: Rolling clay into long ropes and building up the piece by stacking and attaching coils.
- Slab method: Creating flat pieces by rolling clay into even sheets and cutting shapes to construct objects.
- Pinching method: Using your fingers to pinch and shape the clay into desired forms.
- Hollowing out: Constructing hollow forms by building layers of clay and carving out excess material.
Intermediate and advanced sculpting methods:
- Armature technique: Creating a supportive framework from wire or other materials to provide structural stability for larger sculptures.
- Modeling technique: Manipulating the clay with your hands and tools to shape and refine the details of your sculpture.
- Carving technique: Using various carving tools to remove clay and create intricate textures and patterns.
- Surface treatments: Adding texture, patterns, or designs to the surface of your clay piece using tools, stamps, or other techniques.
Remember, each technique requires practice and patience. Don’t be afraid to experiment and find your unique style. Enjoy the process of working with white clay and let your creativity guide you in shaping and sculpting beautiful and expressive pieces.
Now that you have a better understanding of the different techniques for working with white clay, it’s time to put your hands in the clay and start creating! Whether you are a beginner or more advanced, practice and experimentation will help you develop your skills and unleash your creativity.
So grab your tools and let your imagination run wild as you shape and sculpt with white clay. Happy creating!
Drying And Curing Processes
Learn the proper drying and curing processes for making white clay. Discover effective techniques to ensure a smooth and durable finish for your clay creations.
Air-Drying Vs. Oven-Drying
Air-drying:
- Place the formed clay objects in a well-ventilated area away from direct sunlight.
- Allow the clay to dry naturally over a period of several days or weeks, depending on the size and thickness of the clay.
- Keep an eye on the drying process to ensure even drying and prevent the formation of cracks or deformations.
Oven-drying
- Preheat the oven to a low temperature, typically around 200°F (93°C).
- Place the clay objects on a baking sheet lined with parchment paper or a silicone mat to prevent sticking.
- Bake the clay in the oven for the recommended time, usually between 30 minutes to 2 hours, depending on the manufacturer’s instructions.
- Avoid baking the clay at high temperatures as it may cause the clay to burn or become brittle.
Tips For Preventing Cracks And Deformations
- Work with the appropriate clay consistency: Ensure that the clay is properly conditioned and has an even texture before shaping it. This helps prevent air pockets and inconsistencies that can lead to cracks during the drying and curing process.
- Support larger or more intricate designs: If you’re working with larger or more complex clay creations, consider using armatures or supports to provide stability and prevent sagging or warping. These supports can be removed once the clay is completely dry.
- Avoid sudden temperature changes: Rapid changes in temperature can cause the clay to expand or contract, leading to cracks. Allow the clay to cool gradually after baking and avoid exposing it to extreme temperature variations.
- Maintain even thickness: As you shape the clay, ensure an even thickness throughout to promote uniform drying. Thicker sections take longer to dry and may lead to uneven shrinkage, resulting in cracks or deformations.
Curing Techniques For Durable And Long-Lasting Results
- Heat curing: Some types of clay require additional heat curing to strengthen them further. This is typically done after air or oven-drying. Follow the manufacturer’s instructions for the recommended temperature and duration for heat curing. This process helps to harden the clay and improve its durability.
- Sealing: Once the clay is completely dry and cured, consider applying a sealant or varnish to protect the finished piece from moisture, dust, and potential damage. Choose a sealant suitable for the type of clay used and follow the application instructions carefully.
- Sanding and buffing: For a smooth and polished finish, sanding and buffing can be done after curing. Use fine-grit sandpaper to gently sand any rough edges or imperfections. Follow it up with a buffing cloth or pad to achieve a glossy or matte finish, depending on your preference.
Remember, the drying and curing processes are crucial steps in creating beautiful, long-lasting white clay creations. Take your time and follow the recommended techniques to ensure excellent results.

Sanding And Finishing Touches
Discover the essential steps to create flawless white clay by focusing on sanding and finishing touches. Achieve a smooth and polished texture that will elevate your clay projects to a new level of craftsmanship.
Importance Of Smooth Surfaces And Edges
Having smooth surfaces and edges is crucial when working with white clay. It not only enhances the overall appearance of your clay creations but also improves their durability. Smooth surfaces and edges are essential for achieving a polished and professional look.
Here are some reasons why smooth surfaces and edges are important when working with white clay:
- Prevents roughness: Smooth surfaces and edges eliminate any rough or uneven texture on your clay creations, ensuring a flawless finish.
- Enhances aesthetics: A smooth surface lends an elegant and refined look to your white clay creations, making them more visually appealing.
- Improves functionality: Smooth edges make your clay creations safe to handle and touch without the risk of accidental scratches or cuts.
- Facilitates paint application: Smooth surfaces and edges provide an ideal canvas for painting and allow the paint to adhere better, resulting in a more vibrant and beautiful finish.
Sanding Techniques For A Polished Look
Sanding plays a crucial role in achieving a polished look for your white clay creations. It helps in removing imperfections, smoothening rough surfaces, and enhancing the overall finish. Here are some effective sanding techniques to achieve a polished look:
- Start with coarse sandpaper: Begin by using coarse sandpaper (around 80-120 grit) to remove any larger imperfections or roughness on the surface of your clay creation.
- Gradually move to finer grits: As you progress with sanding, switch to finer grit sandpapers (e.g., 220, 320, 400) to smoothen the surface further. The finer grits will help remove any visible scratches left by the previous coarse sandpaper.
- Apply even pressure: While sanding, apply even pressure across the surface of your clay creation to maintain a consistent smoothness.
- Check progress frequently: Regularly examine your clay creation under good lighting to assess the progress of your sanding. This will help you identify areas that need additional attention.
- Finish with polishing: After achieving a smooth surface, use a polishing cloth or a high-grit sandpaper (e.g., 800-1200) to give your clay creation an extra level of shine and glossiness.
Applying A Protective Finish
Once you have achieved smooth surfaces and edges through sanding, it is essential to apply a protective finish to your white clay creations. This will not only add an extra layer of protection but also enhance the longevity of your clay pieces.
Here’s how to apply a protective finish:
- Choose an appropriate finish: Select a finish that suits your specific needs and desired outcome. Common options include glossy varnish, matte varnish, or polyurethane. Consider the level of shine, desired texture, and durability.
- Prepare the clay surface: Ensure the clay surface is clean and free from any dust, fingerprints, or debris before applying the protective finish. Wipe it gently with a soft cloth or brush.
- Apply the finish: Use a clean brush or sponge to apply the protective finish evenly across the entire surface of your clay creation. Follow the product’s instructions for the recommended number of coats and drying times.
- Allow proper drying and curing: Let the protective finish dry and cure completely according to the manufacturer’s instructions. This is important to ensure the finish is fully set and provides adequate protection.
- Reapply if necessary: Depending on the desired level of protection, you may need to apply multiple coats of the protective finish. Follow the manufacturer’s recommendations for optimal results.
By following these sanding techniques and applying a protective finish, you can achieve a polished and professional look for your white clay creations. Remember, smooth surfaces and edges are key to creating visually appealing and durable clay pieces.
Creative Ideas And Inspirations
Learn how to make white clay with our creative ideas and inspirations. Get step-by-step instructions to create your own homemade white clay for a variety of crafting projects.
Diy Projects Using White Clay
- Create handmade jewelry: Mold the white clay into different shapes and sizes to make beautiful pendants, earrings, and bracelets. Use acrylic paints or markers to add color and detail to your designs.
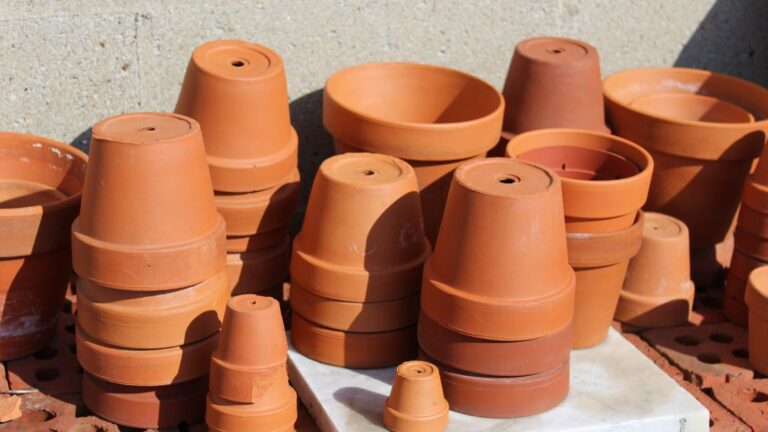
- Decorate plant pots: Give your plain plant pots a stylish makeover by covering them with white clay. You can create intricate patterns, add texture, or even sculpt small figurines to attach to the pots.
- Make personalized keychains: Roll out the clay and cut it into keychain shapes using cookie cutters. Use stamps or engraving tools to add names or initials for a customized touch.
- Sculpt mini figurines: Let your creativity flow and sculpt mini animals, people, or objects with white clay. Use reference images or your imagination to bring your creations to life.
- Design refrigerator magnets: Flatten the clay and use cookie cutters to create various shapes. Attach magnets to the back and decorate the front with paint or markers. These magnets can be both functional and decorative.
Home Decor And Gift Ideas
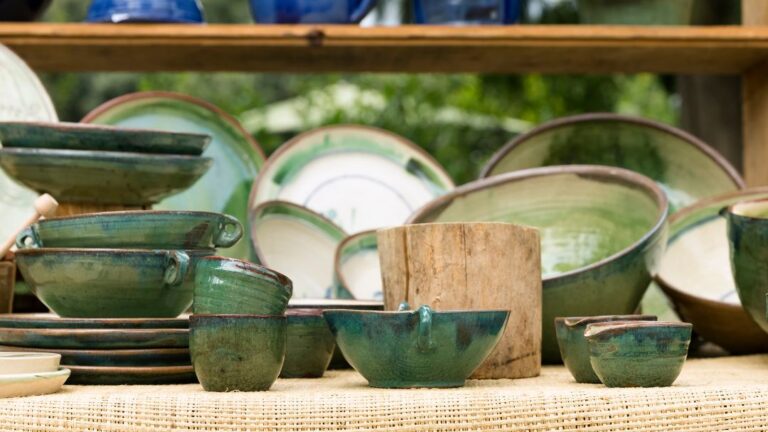
- Decorative clay bowls: Sculpt white clay into elegant bowls of different sizes and shapes. Add patterns or paint them to complement your home decor. These bowls can be used to hold keys, jewelry, or small trinkets.
- Wall art: Roll out the clay and cut it into tiles or shapes. Mold various designs and attach them to a canvas or frame. Once dried, you can paint the clay pieces or leave them in their natural white color for a unique and eye-catching wall art display.
- Candle holders: Shape the clay into holders to fit tea lights or larger candles. Experiment with textures or cut-out patterns to allow the candlelight to create beautiful shadows.
- Personalized coasters: Flatten the clay and cut it into coaster-sized circles or squares. Use stamps, markers, or paint to add initials, names, or intricate designs. These coasters make thoughtful and personalized gifts for friends and family.
- Customized photo frames: Create unique photo frames by molding the clay around an existing frame or making your own. Add texture, paint, or decorative embellishments to make each frame truly special.
Exploring Various Artistic Possibilities
- Clay sculptures: Challenge yourself by sculpting larger and more complex clay sculptures. Let your imagination run wild and experiment with different techniques and styles.
- Mixed media art: Combine white clay with other materials like paper, fabric, or wood to create mixed media art pieces. Explore the contrast and texture that these materials can bring to your artwork.
- Texture experiments: Use various tools and objects to create different textures on the clay surface. This could include pressing fabric, leaves, or even bubble wrap into the clay. Play around with different combinations and see the unique effects you can achieve.
- Clay imprints: Make imprints of objects, leaves, or textures onto the clay surface for a realistic and detailed effect. This technique can be used in jewelry making, home decor, or simply as standalone art pieces.
- Collaborative projects: Organize clay workshops or collaborative art projects with friends or family. Each person can bring their ideas and creativity to the table, resulting in exciting and diverse artwork.
Remember, white clay is a versatile medium that allows you to unleash your artistic potential. So go ahead and try out these creative ideas and inspirations to bring your imagination to life!
Troubleshooting Common Issues
Learn how to troubleshoot common issues when making white clay. Discover expert tips and tricks for navigating problems and achieving the perfect consistency for your clay projects.
Common Problems And Their Solutions
One of the great things about working with white clay is that it’s a versatile material that can be molded into various shapes. However, there are some common issues that can arise during the process. Don’t worry though, because I’ve got you covered with some troubleshooting tips.
In this section, I’ll discuss how to deal with cracks, air bubbles, and uneven drying. So, let’s dive in!
Dealing With Cracks, Air Bubbles, And Uneven Drying
Cracks, air bubbles, and uneven drying can be frustrating, but they’re also common problems that can occur when working with white clay. Here are some solutions to help you troubleshoot these issues:
Cracks:
- One common cause of cracks is the clay drying too quickly. To prevent this, cover your clay with a wet cloth or plastic wrap while you work on other areas.
- Another cause of cracks is not giving the clay enough time to dry. Ensure that you let your clay dry completely before moving on to the next step.
- If cracks appear after the clay has dried, you can try filling them with a mixture of clay and water. Smooth out the area, let it dry, and then sand it down for a seamless finish.
Air bubbles:
- The presence of air bubbles can ruin the appearance of your white clay creation. To avoid this issue, make sure to knead your clay thoroughly before starting your project. This will help to remove any trapped air.
- Rolling the clay with a rolling pin can also help in releasing any air bubbles that might be present.
- If you still encounter air bubbles, you can gently prick them with a pin and smooth the surface until it blends with the rest of the clay.
Uneven drying:
- Uneven drying can cause your clay to crack or warp. To ensure even drying, make sure your clay is rolled out to a consistent thickness.
- Placing your clay creation on a flat surface while drying can also help to achieve even drying.
- If you notice uneven drying in certain areas, you can lightly mist the clay with water to slow down drying in those spots.
Tips For Troubleshooting And Avoiding Mistakes
Now that you’ve learned how to deal with cracks, air bubbles, and uneven drying, let’s explore some tips for troubleshooting and avoiding other common mistakes that can occur when making white clay objects:
- Keep your workspace clean and free from dust or debris that can get trapped in your clay.
- Use the recommended type of clay and follow the instructions for temperature and baking time.
- Take your time and work at a steady pace to avoid rushing through the process.
- If you’re unsure about a particular technique or step, do some research or consult a trusted resource for guidance.
- Experiment with different tools and techniques to find what works best for you.
- Practice makes perfect, so don’t be discouraged by any mistakes. Embrace the learning process and enjoy the creative journey.
By understanding how to troubleshoot and avoid common issues when working with white clay, you’ll be able to create beautiful and flawless creations. Remember to take your time, be patient, and most importantly, have fun!
Safety Precautions And Storage Tips
Learn how to make white clay with these safety precautions and storage tips. Follow these guidelines for a smooth and safe clay-making experience.
White clay, also known as kaolin clay, is a versatile material that can be used for various crafts and DIY projects. This natural clay is not only great for sculpting and pottery but also for beauty and skincare products. Before you dive into the exciting world of white clay creations, it’s important to familiarize yourself with some safety precautions and storage tips to ensure a smooth and enjoyable experience.
Read on to discover how you can create a safe and clean workspace, properly store unused clay, and handle and dispose of clay-related waste.
Ensuring A Safe And Clean Workspace
- Cover your work surface: Place a plastic sheet or protective covering on your work surface to make cleanup easier. This will prevent clay particles from getting embedded in your table or counter.
- Wear protective gear: When working with any type of clay, it’s important to protect your hands and lungs. Consider wearing gloves to keep your hands clean and prevent any potential skin irritation. Additionally, wearing a dust mask will help you avoid inhaling clay dust particles.
- Proper ventilation: Working in a well-ventilated area is crucial, as clay can release dust particles into the air. Open windows or use a fan to improve air circulation and minimize exposure to clay dust.
Proper Storage Of Unused Clay
- Seal the container: After completing your project or if you have any leftover clay, make sure to store it properly to keep it fresh and usable in the future. Seal the container tightly to prevent air from drying out the clay.
- Avoid exposure to moisture: It’s essential to keep white clay dry, as moisture can cause it to become moldy or lose its texture. Store the clay in a cool and dry place, away from humid environments.
- Separate different clay types: If you have multiple types of clay, it’s a good idea to store each variety separately. This will help maintain their individual qualities and prevent any cross-contamination.
Handling And Disposing Of Clay-Related Waste
- Clean as you go: White clay can leave residue on surfaces, tools, and utensils. To make cleaning easier, wipe away any excess clay immediately after use. This will prevent the clay from drying and hardening, making it more challenging to remove.
- Dispose of clay waste responsibly: When you have clay scraps, packaging materials, or any clay-related waste, it’s important to dispose of them properly. Avoid flushing any clay down the drain, as it can clog the pipes. Instead, place solid clay waste in a bag and dispose of it in the regular trash.
- Recycling options: If you’re concerned about the environmental impact of clay waste, consider researching recycling options in your area. Some facilities may accept clay for recycling or repurposing purposes.
By following these safety precautions and storage tips, you can create a safe and clean workspace, ensure the longevity of your unused clay, and handle and dispose of clay-related waste responsibly. Now that you’re equipped with this knowledge, you can confidently dive into your white clay projects and unleash your creativity!
Conclusion
Making white clay at home is an easy and cost-effective way to explore your creativity and indulge in a therapeutic art form. With just a few simple ingredients like baking soda, cornstarch, water, and oil, you can create a versatile and moldable clay that is perfect for various art projects.
By following the step-by-step process mentioned in this blog post, you can customize the clay’s texture, color, and fragrance according to your preference. This DIY white clay recipe allows you to unleash your imagination and create beautiful sculptures, jewelry, and decorative pieces.
Whether you are a beginner or an experienced artist, making white clay at home provides a rewarding experience that stimulates your creativity and allows you to relax and unwind. So, gather your materials and start sculpting your masterpiece today!