How to Stick Polymer Clay Together: Mastering the Art of Bonding
To stick polymer clay together, apply pressure and use a strong adhesive that is compatible with the clay. Polymer clay is a versatile and popular material for crafting.
Whether you are making jewelry, figurines, or other creations, being able to stick pieces of polymer clay together securely is important for achieving a desired design or structure. However, simply pressing the clay pieces together may not always be enough to ensure a strong bond.
This is where a strong adhesive comes into play. By applying pressure and using a compatible adhesive, you can effectively join the clay pieces together for a secure and long-lasting hold. We will explore different methods and tips for sticking polymer clay together successfully.
Exploring The Basics Of Polymer Clay Adhesion
Get started with polymer clay adhesion. Discover effective techniques to stick polymer clay together seamlessly for your crafting projects.
Bonding Polymer Clay: A Guide To Adhesion
Polymer clay is a versatile and popular medium for crafters and artists. Whether you’re creating jewelry, sculptures, or other decorative items, knowing how to stick polymer clay together is essential. We will explore the basics of polymer clay adhesion, highlighting the importance of adhesion for creating durable clay projects.
We will also discuss common challenges faced when bonding polymer clay and offer helpful tips to overcome them.
Introduction To Bonding Polymer Clay
Bonding polymer clay involves joining two or more pieces of clay together to create a cohesive structure. This process allows you to achieve complex shapes or add intricate details to your clay projects. To ensure a strong bond, it’s important to understand the various techniques and materials that can be used for adhesion.
Importance Of Adhesion For Creating Durable Clay Projects
Adhesion plays a vital role in the overall durability and longevity of your polymer clay projects. A strong bond between clay pieces prevents them from separating or breaking apart, ensuring that your creations withstand the test of time. Here are some key reasons why adhesion is crucial:
- Enhances structural integrity: Proper adhesion reinforces the structure of your clay projects, preventing them from becoming weak or fragile.
- Supports detailed designs: By securely bonding clay pieces, you can add intricate details that would be otherwise impossible to achieve.
- Enables versatility: Adhesion allows you to combine different colors, textures, and shapes, expanding your creative possibilities.
- Facilitates seamless finishes: When clay pieces are bonded effectively, the seams become virtually invisible, enhancing the overall aesthetics of your project.
Common Challenges Faced When Bonding Polymer Clay
Although bonding polymer clay may seem straightforward, there are some common challenges that crafters often encounter. These challenges can affect the strength and quality of the bond. Below are some primary issues to be aware of:
- Inconsistent texture: When clay pieces have different textures, it can hinder the bonding process. A smooth and even surface promotes better adhesion.
- Insufficient pressure: Applying adequate pressure while joining clay pieces ensures a strong bond. Failing to do so may result in weak connections.
- Contaminated surfaces: Dust, dirt, or residue on the clay surfaces can hinder adhesion. It’s important to ensure that the surfaces are clean and free from any contaminants.
- Incompatible materials: Different brands or types of polymer clay may have varying compositions, leading to poor adhesion when combined. Testing compatibility before bonding is advisable.
Understanding these common challenges will help you overcome them and achieve stronger and more reliable bondings in your polymer clay projects.
Polymer clay adhesion is a fundamental aspect of working with this versatile medium. By understanding the basics of bonding polymer clay, appreciating the importance of adhesion for durability, and being aware of common challenges, you can successfully create cohesive and long-lasting clay projects.
Stay tuned for our upcoming sections, where we will delve into specific techniques and materials for bonding polymer clay.

Preparing The Clay Surface For Bonding
Learn how to prepare the clay surface for bonding in order to effectively stick polymer clay together. By following these steps, you can ensure a strong and durable bond between clay pieces.
Properly Conditioning And Cleaning The Clay
- Conditioning the clay: Before attempting to stick polymer clay together, it is crucial to properly condition the clay. This involves softening the clay by kneading it in your hands. Kneading helps warm up the clay and make it more pliable, allowing for easier manipulation and bonding.
- Cleaning the clay: Before bonding, it is important to ensure that the clay surface is free from any debris, dust, or oils. Cleaning can be done using a lint-free cloth or rubbing alcohol. This step helps improve the bond between the clay pieces.
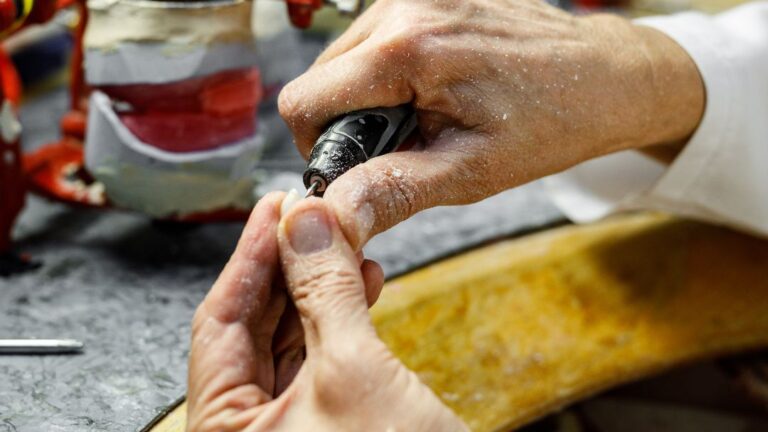
Sanding And Buffing Techniques For Smooth Surfaces
- Sanding the clay: Sanding is an essential step to achieve a smooth surface on polymer clay. It helps remove any imperfections, scratches, or rough edges. Start with a coarse grit sandpaper and gradually move to finer grits for a polished finish.
- Buffing the clay: Buffing adds the final touch to the clay surface, giving it a glossy and professional look. Buffing can be done using a soft cloth or a buffing wheel attached to a handheld tool. Apply a light pressure in circular motions for best results.
Using Release Agents To Prevent Sticking
- What are release agents: Release agents create a barrier between the clay and other surfaces, preventing them from sticking together permanently. They can be applied to molds, tools, or even other clay surfaces.
- Common release agents: Some common release agents include cornstarch, talcum powder, or even a thin layer of petroleum jelly. Apply a thin, even layer of the selected release agent before pressing the clay pieces together. This helps ensure easy separation once the clay is cured.
Remember, properly conditioning and cleaning the clay, along with using sanding and buffing techniques, are crucial for achieving a seamless bond when sticking polymer clay together. Additionally, using release agents can prevent the clay from permanently sticking to other surfaces.
With these techniques, you can confidently create beautiful and durable polymer clay projects.
Choosing The Right Adhesive For Polymer Clay
Choosing the right adhesive for polymer clay can be a crucial step in ensuring that your creations stick together securely. With various options available, it’s essential to select a reliable adhesive that bonds effectively with the clay, resulting in durable and long-lasting artwork.
Polymer clay is a versatile medium that can be used to create various crafts and jewelry pieces. However, when it comes to assembling different pieces of polymer clay together, choosing the right adhesive is crucial for a strong and durable bond. There are several adhesive options available, each with its own advantages and disadvantages. Here’s a brief overview to help you make an informed decision:
Comparing The Pros And Cons Of Different Adhesive Types:
Super Glue
- Pros:
- Provides a strong and fast bond.
- It is clear and is usually transparent.
- Offers good flexibility once cured.
- Cons:
- Can be brittle, especially when used on thin or delicate clay pieces.
- May leave a shiny residue on the clay surface.
- Not recommended for long-term exposure to moisture.
Epoxy Resin
- Pros:
- Offers an extremely strong bond.
- Can be used to fill gaps and reinforce clay structures.
- Doesn’t leave any sticky residue.
- Cons:
- Requires mixing two components before application.
- Takes a longer time to cure compared to other adhesives.
Liquid Polymer Clay
- Pros:
- Bonds polymer clay pieces seamlessly.
- Can be used for transparent and invisible joins.
- Allows for additional sculpting and detailing.
- Cons:
- Requires baking after application.
- Not as strong as other adhesive options.
Bake and Bond
- Pros:
- Specifically formulated for polymer clay.
- Provides a strong and permanent bond.
- Can be baked along with the clay pieces.
- Cons:
- Can leave a visible line where it is applied.
- May require additional sculpting to blend the bond into the design.
Considering Factors Such As Strength, Transparency, And Flexibility
When choosing the right adhesive for polymer clay, it’s essential to consider factors such as strength, transparency, and flexibility. Each adhesive type has its own characteristics that may or may not align with your project requirements. Here’s a quick guide to help you make an informed decision:
Strength:
- Super Glue and Epoxy Resin offer strong bonds that can withstand daily wear and tear.
- Liquid Polymer Clay and Bake and Bond provide sufficient strength for most crafts and jewelry applications.
Transparency:
- Super Glue, Epoxy Resin, and Liquid Polymer Clay dry clear and are generally transparent when applied correctly.
- Bake and Bond may leave a visible line but can be blended into the design with additional sculpting.
Flexibility:
- Super Glue and Epoxy Resin provide good flexibility once cured.
- Liquid Polymer Clay and Bake and Bond offer some flexibility but may be less forgiving on thin or delicate clay structures.
Considering these factors will help you choose the right adhesive for your polymer clay projects. Experimenting with different adhesives and finding the one that suits your needs best is key to achieving long-lasting and visually pleasing results.
Mastering The Art Of Baking Polymer Clay
Learn the art of baking polymer clay with precision as you discover the techniques to effectively stick the clay pieces together. Discover expert tips in this comprehensive guide.
Importance Of Properly Baking The Clay For Successful Bonding
Baking polymer clay is a crucial step in the creation process that ensures the durability and strength of the final product. By following the correct temperature and time requirements, you can effectively bind the clay together and achieve the desired results.
Here are some reasons why mastering the art of baking polymer clay is important:
- Properly baked clay offers better adhesion: Baking the clay at the right temperature ensures that all the layers bond together securely, minimizing the risk of cracks or breakage.
- Enhances the strength of the clay: When polymer clay is cured correctly, it becomes stronger, making it more suitable for various crafting projects.
- Improves the clay’s ability to hold intricate details: Baking polymer clay at the appropriate temperature helps preserve intricate details and textures, ensuring that your creations turn out exactly as you envisioned.
- Increases resistance to wear and tear: A well-baked polymer clay piece will be more resistant to scratches, dents, and general wear and tear, making it last longer.
Understanding Temperature And Time Requirements
To achieve optimum baking results, it’s crucial to understand the temperature and time requirements for polymer clay. Consider the following points:
- Accurate temperature: Different brands and types of polymer clay have varying temperature requirements. It is essential to carefully read the instructions provided by the manufacturer and set your oven accordingly. Generally, the temperature should be in the range of 230°F to 275°F (110°C to 130°C).
- Proper curing time: The curing time depends on the thickness and size of the clay piece. Thicker pieces may require longer baking times. As a general guideline, it is recommended to bake polymer clay for about 15-30 minutes per ¼ inch (6mm) thickness. Overbaking can cause burning or discoloration, while underbaking may result in weak bonding.
- Use an oven thermometer: Ovens can have temperature variations, so it is advisable to use an oven thermometer to ensure the accurate temperature required for baking the clay.
Tips For Avoiding Common Baking Mistakes
Mastering the art of baking polymer clay involves avoiding common mistakes that can compromise the final result. Here are some helpful tips to prevent mishaps:
- Use a dedicated oven: To prevent contamination, it is best to use a separate oven for baking polymer clay and not use it for cooking food.
- Test temperature and timing: Before starting your main baking session, test a small piece or a swatch to determine the appropriate temperature and baking time for your specific brand of clay. This will prevent any unpleasant surprises when baking your actual projects.
- Support your clay: Place your clay creations on a baking surface like ceramic tiles or a baking sheet lined with parchment paper to ensure they maintain their shape during baking.
- Monitor the baking process: Keep a close eye on your clay while it is baking to prevent any overheating or burning. If you notice any changes in color or smell, lower the temperature immediately.
- Allow for proper cooling: After baking, allow your clay creations to cool naturally before handling them. This helps prevent any deformation or damage to the finished piece.
By understanding the importance of properly baking polymer clay, mastering temperature, and time requirements, and following essential tips to avoid common baking mistakes, you can ensure a successful bonding process. Empowered with this knowledge, you’ll be ready to create stunning polymer clay masterpieces that will stand the test of time.
Applying Adhesive For Bonding Clay
To bond polymer clay, follow these steps to apply adhesive correctly and achieve a strong and durable hold. Get a clean surface, apply a thin layer of adhesive, align the pieces, and press firmly for optimal results.
Step-By-Step Guide To Applying Adhesive
- Before applying adhesive to stick polymer clay together, make sure the surfaces are clean and free from any dust or debris.
- Choose a suitable adhesive specifically designed for bonding clay. Epoxy glues, cyanoacrylate (super glue), and liquid clay are popular choices.
- Squeeze a small amount of adhesive onto the designated areas where you want to join the clay pieces.
- Use a toothpick or a small brush to spread the adhesive evenly over the surfaces that need to be bonded.
- Press the clay pieces firmly together, ensuring a strong connection. Hold them in place for a few seconds to allow the adhesive to take hold.
- Clean up any excess adhesive that may have squeezed out from the bond using a cotton swab or a damp cloth.
- Allow the adhesive to fully cure according to the manufacturer’s instructions before handling or further working with the clay.
Ensuring Even Coverage For Strong Bonds
- To achieve a strong bond between polymer clay pieces, it is essential to ensure even coverage of the adhesive.
- Apply the adhesive with a steady hand, working in small sections if necessary to prevent drying out or premature bonding.
- Spread the adhesive thinly and evenly over the surfaces to be joined, avoiding excessive amounts that may seep out and be difficult to clean up.
- Consider using a toothpick or a small brush to apply the adhesive, as this allows for better control and precision.
- Take your time and be patient, ensuring that all areas requiring bonding receive a sufficient amount of adhesive for a durable connection.
Techniques For Hiding Adhesive Lines
- Although strong adhesive bonds are crucial, it is also desirable to hide any visible adhesive lines in the finished piece.
- One effective technique is to use the same color or a complementary shade of clay to blend in the bonded area with the surrounding clay.
- Roll out a thin sheet of clay and gently press it onto the bonded area, smoothing it over and ensuring a seamless transition.
- Another option is to use texture or surface treatments to camouflage the adhesive lines. Embossing tools, texture stamps, or even sculpting additional details can help mask the bond.
- Take care not to press too hard or distort the shape of the clay while concealing the adhesive lines.
- Finally, after concealing the adhesive lines, bake the clay according to its instructions to cure both the clay and the adhesive securely.
These step-by-step instructions will guide you through the process of applying adhesive to stick polymer clay together. Ensuring even coverage and employing techniques to hide adhesive lines will help you achieve strong bonds and aesthetically pleasing results. By following these guidelines, you can create beautiful and durable polymer clay creations.
Enhancing Bond Strength With Mechanical Techniques
To ensure a secure and long-lasting bond when working with polymer clay, incorporating mechanical techniques can greatly enhance the adhesive properties. By employing methods such as scoring and layering, using armature wire for structurally sound designs, and creating texture and patterns that promote adhesion, you can confidently stick polymer clay pieces together.
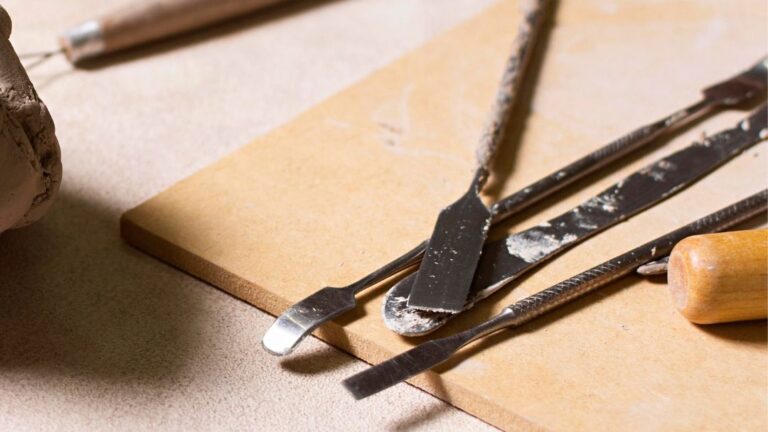
Incorporating Techniques Such As Scoring And Layering
- Scoring: Begin by gently roughening the areas that will be joined using a craft knife or a needle tool. By creating small grooves and scratches, you provide more surface area for the clay to adhere to, resulting in a stronger bond.
- Layering: Another effective technique is to create layered connections by adding thin sheets or snakes of clay between the surfaces to be joined. This creates additional bonding points, increasing bond strength.
Using Armature Wire For Structurally Sound Designs
- Armature wire: For larger or more complex designs, incorporating armature wire provides structural support, ensuring the integrity of your polymer clay creation. By inserting a wire into the clay and securing it in place, you can prevent stress and strain on the bond, making it more robust.
Creating Texture And Patterns That Promote Adhesion
- Texturing: Before joining clay pieces, consider adding texture to the surfaces that will be bonded. This can be done using various tools or objects like stamps, toothbrushes, or textured mats. The increased surface area allows for improved adhesion between the clay layers.
- Patterns: Experiment with creating patterns on the surface of your clay pieces. By carving or imprinting intricate designs, you can increase the unique bonding points, enhancing the strength and visual appeal of your polymer clay project.
By incorporating these mechanical techniques into your polymer clay work, you can ensure superior bond strength. Whether it’s scoring and layering, using armature wire for structural support, or creating texture and patterns that promote adhesion, these methods will elevate your polymer clay creations to the next level.
Troubleshooting Bonding Issues
Having trouble bonding polymer clay? Follow these steps to achieve a strong bond without any hassle. Increase the longevity of your creations by mastering the art of sticking polymer clay together.
Identify Common Issues When Bonding Clay
- Insufficient pressure: Lightly pressing the clay pieces together may result in weak bonds.
- Contamination: Oils, dirt, or debris on the clay’s surface can hinder proper bonding.
- Inadequate conditioning: Clay that hasn’t been properly conditioned may have air pockets, causing bonding issues.
- Incorrect curing temperature: The oven temperature being too low or too high can lead to weak bonds.
- Rushing the process: Bonding requires patience; rushing can result in incomplete fusion.
- Mixing incompatible clays: Different brands or types of polymer clay may not bond well together.
Solutions To Fix Weak Or Failed Bonds
- Apply more pressure: Increase the pressure when pressing the clay pieces together to ensure a stronger bond.
- Clean the surface: Prior to bonding, clean the clay’s surface with rubbing alcohol or soap and water to remove any contaminants.
- Condition thoroughly: Properly condition the clay by kneading it until soft and pliable, ensuring no air pockets remain.
- Adjust the curing temperature: Follow the manufacturer’s instructions to ensure the correct curing temperature for optimal bonding.
- Allow sufficient curing time: Make sure to give the clay enough time to cure properly for a strong bond.
- Use compatible clays: Stick to the same brand and type of clay to ensure better compatibility and bonding.
Preventing Future Bonding Problems
- Store clay properly: Keep the clay in an airtight container to prevent it from drying out, which can affect bonding.
- Limit handling during bonding: Excessive handling of the clay during bonding can introduce oils or dirt, so handle it with care.
- Avoid excessive baking: Over-baking the clay can make it brittle, reducing its ability to bond effectively.
- Use a baking surface: Place the clay on a non-porous surface, such as a ceramic tile or baking sheet, to prevent bonding issues caused by the clay absorbing contaminants from a porous surface.
- Practice proper conditioning: Spend enough time conditioning the clay to ensure it is free of air pockets and ready to bond.
Remember, troubleshooting bonding issues may require some experimentation and practice. With patience and careful attention to detail, you can achieve strong and lasting bonds when working with polymer clay.
Exploring Advanced Bonding Techniques
Polymer clay is a versatile medium that allows artists to create intricate designs, but ensuring a strong bond between different pieces can be a challenge. Thankfully, there are advanced bonding techniques that can help you achieve seamless joins and invisible repairs, as well as incorporate mixed media elements into your polymer clay designs.
In this section, we will explore these techniques in detail, providing you with the knowledge to take your projects to the next level.
Creating Seamless Joins And Invisible Repairs
When it comes to creating seamless joins in polymer clay, precision is key. By following these techniques, you can achieve flawless connections and invisible repairs:
- Raw join method: This technique involves joining two raw clay surfaces together. Simply smooth the surfaces and gently press them together, ensuring the edges line up perfectly.
- Baking powder method: Mix a small amount of baking powder with liquid polymer clay until it forms a paste. Apply this paste to the surfaces you want to join and press them together. After baking, any excess paste can be sanded away, leaving a seamless join.
- Liquid clay method: Apply a thin layer of liquid polymer clay to both surfaces you want to join. Press them together firmly and use a heat gun or oven to cure the clay. This method creates a strong, virtually invisible bond.
Incorporating Mixed Media Elements Into Polymer Clay Designs
Adding mixed media elements to your polymer clay designs can bring them to life and add a unique touch. Here are some techniques for incorporating different materials into your projects:
- Embedding: Embed small objects, such as beads, wire, or fabric, into the clay before baking. Ensure they are securely placed to prevent them from shifting during the baking process.
- Surface embellishments: Enhance your polymer clay designs by adding texture using tools like stamps, texture sheets, or even natural elements like leaves or lace. Press these onto the clay before baking to create interesting patterns and designs.
- Painting and varnishing: Use acrylic paints or alcohol inks to add color and depth to your polymer clay creations. Once painted, seal your design with a layer of varnish or resin for a professional finish.
- Wirework: Incorporate wire into your polymer clay designs to create structural support or add decorative elements. Secure the wire to the clay by embedding it or wrapping it around the clay before baking.
By mastering these advanced bonding techniques and exploring mixed media elements, you can take your polymer clay projects to new heights. With practice, patience, and creativity, you’ll be able to create stunning and intricate designs that are sure to impress.
So grab your clay and let your imagination run wild!
Tips For Maintaining Bonded Polymer Clay Projects
Looking to stick polymer clay together? Follow these essential tips for maintaining bonded polymer clay projects. With proper techniques, you can ensure long-lasting and secure connections between clay pieces, creating beautiful and durable artwork.
Polymer clay is a versatile and popular material for creating intricate and beautiful artworks. When working with polymer clay, it’s essential to know how to stick the pieces together properly to ensure a durable and long-lasting bond. In this section of the blog post, we will focus on the tips for maintaining bonded polymer clay projects, including proper care and handling, protecting the adhesive bond, and storing and displaying your creations.
Proper Care And Handling To Prevent Accidental Breakage
- Avoid exerting excessive pressure or force on the bonded areas to prevent accidental breakage.
- Handle delicate polymer clay projects with care, especially when they are freshly bonded.
- Let the bonded clay cure properly according to the manufacturer’s instructions before subjecting it to stress or manipulation.
- Use supportive structures or armatures, if necessary, to provide additional strength and stability to your artwork.
- Consider using conditioning techniques to ensure the clay is soft and pliable before bonding, as this can lead to a stronger bond.
Protecting The Adhesive Bond From Moisture And Heat
- Keep your bonded polymer clay projects away from moisture to prevent weakening or loosening of the bond. Moisture can also cause the clay to become brittle over time.
- Avoid exposing your creations to high temperatures or direct sunlight, as this can lead to warping or softening of the clay and compromising the bond.
- If you need to clean your polymer clay artwork, gently wipe it with a soft, dry cloth to avoid introducing moisture.
- Consider applying a protective finish, such as a sealant or varnish, to create a barrier that shields the bonded areas from moisture and heat.
How To Store And Display Bonded Polymer Clay Artworks
- Store your bonded polymer clay creations in a cool, dry place, away from direct sunlight or extreme temperature fluctuations. This helps to prevent damage or deterioration of the clay and the bond.
- If possible, use a protective container or display case to shield your artwork from dust, humidity, and physical damage.
- When displaying your bonded polymer clay projects, choose a stable surface or stand that supports the weight of the artwork without straining or putting pressure on the bond.
- Avoid placing your creations near sources of heat or moisture, such as radiators or windows, to maintain the integrity of the bond.
- Regularly inspect your bonded polymer clay artwork for any signs of damage or loosening of the bond. If you notice any issues, consider repairing or reinforcing the bond to ensure the longevity of your artwork.
Taking proper care of your bonded polymer clay projects is essential for preserving their beauty and durability over time. By following these tips for maintaining the bond, protecting it from moisture and heat, and storing and displaying your creations correctly, you can enjoy your polymer clay artwork for years to come.
Conclusion
So there you have it, a comprehensive guide on how to stick polymer clay together. By following these simple steps and using the right adhesive for your project, you can achieve strong and durable bonds in your polymer clay creations.
Remember to prepare your surfaces properly, apply the adhesive sparingly, and use appropriate pressure to ensure a secure bond. Whether you’re working on jewelry, sculpture, or any other polymer clay project, these techniques will help you achieve professional-looking results. Experiment with different adhesives and methods to find what works best for you.
With practice and patience, you’ll become skilled at joining polymer clay pieces seamlessly. So go ahead, get creative, and let your imagination run wild with this versatile and colorful medium. Happy crafting!