How To Glaze Cement Pottery? Art of Cement Pottery Glazing!
To glaze cement pottery, prepare the surface, apply the glaze, and fire the pottery in a kiln for a permanent finish. Glazing cement pottery involves a simple yet crucial process that adds a final touch of beauty and protection to your creations.
The glaze, composed of various minerals and oxides, creates a glass-like coating on the pottery’s surface. This not only enhances the appearance but also safeguards the cement pottery from water damage and wear.
To achieve a successful glaze, the pottery must be prepared properly, ensuring a clean and smooth surface for the glaze to adhere to.
Once prepared, the glaze can be applied using various techniques, such as brushing or pouring.
Finally, firing the pottery in a kiln at a high temperature will fuse the glaze to the surface, creating a durable and attractive finish for your cement pottery.
Understanding Cement Pottery Glazing
Glazing is a critical step in the process of creating cement pottery. It involves applying a layer of liquid glass or glaze to the surface of the pottery. This glaze undergoes a chemical transformation when fired, resulting in a beautifully glazed finish.
Glazing serves several purposes in cement pottery. Firstly, it provides a layer of protection to the pottery, making it more durable and less prone to chipping or cracking. The glaze acts as a barrier, shielding the pottery from external elements such as water or dirt. This is particularly important for cement pottery, which can be more susceptible to damage compared to other types of pottery.
Secondly, glazing enhances the aesthetic appeal of cement pottery. It adds a glossy or matte finish, depending on the type of glaze used, giving the pottery a professional and refined look. This glaze also allows for a range of possibilities when it comes to color and texture, allowing artists and potters to explore their creativity and create unique pieces.
Different Glazing Techniques for Cement Pottery
There are various glazing techniques that can be used for cement pottery, each producing a different effect. Some popular techniques include:
| Technique | Description |
|---|---|
| Dipping | Immerse the pottery into a glaze bath, ensuring an even coating. |
| Brushing | Apply glaze with a brush, allowing for more control and detail. |
| Spraying | Use a sprayer to evenly coat the pottery with glaze. |
These techniques are chosen based on the desired effect and the potter’s personal preference. Each technique requires a different level of skill and expertise, and experimentation is often key to discovering the perfect glazing technique.
The Role of Glaze in Enhancing the Beauty of Cement Pottery
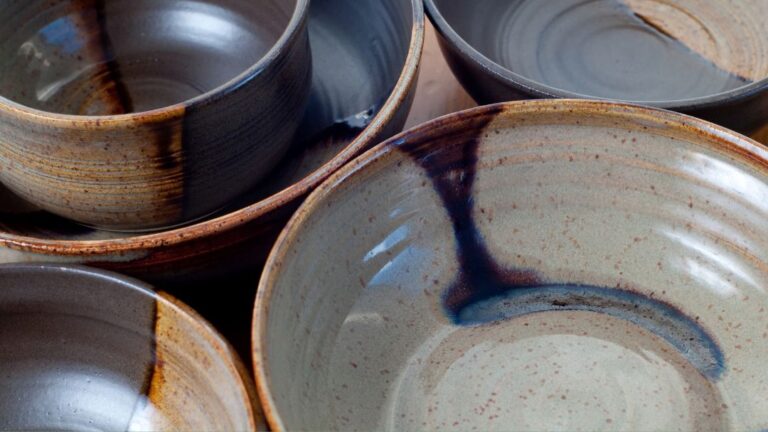
The glaze plays a crucial role in enhancing the beauty of cement pottery. It creates a smooth and glossy surface that reflects light, bringing out the richness of the colors used. This can help accentuate the details and textures of the pottery, giving it depth and dimension.
Furthermore, the glaze can provide unique effects such as crackling, dripping, or glaze runs, adding interest and character to the finished pieces. By selecting the right glaze and applying it skillfully, potters can create stunning effects that make each piece of cement pottery truly one-of-a-kind.
In conclusion, glazing plays a vital role in cement pottery. It not only enhances the durability of the pottery but also brings out its aesthetic appeal. With various glazing techniques available and the ability to create unique effects, glazing truly allows potters to elevate their cement pottery to a whole new level.
Essential Tools And Materials For Cement Pottery Glazing
When it comes to glazing cement pottery, having the right tools and materials is essential for achieving stunning, professional-looking results. Whether you are a beginner or an experienced ceramist, understanding the tools required and the different types of glazes available will help you to create unique and beautiful pieces. In this section, we will explore the comprehensive list of tools, the different types of glazes used in cement pottery, and where to find quality glazing materials.
A Comprehensive List Of Tools Required For Cement Pottery Glazing
Glazing cement pottery involves a specific set of tools to ensure precise application and a smooth, glossy finish. Here is a comprehensive list of the essential tools you will need:
| Tool | Description |
|---|---|
| Glaze brushes | A set of brushes with soft bristles for applying glazes |
| Sponges | Used for smoothing out glaze and creating unique textures |
| Trays | For holding glazes during the application process |
| Kiln shelves | Supports for stacking pottery pieces during firing |
| Gloves | To protect your hands from chemical exposure |
| Mask | For respiratory protection when working with glazes |
| Glaze tongs | Used to safely handle hot pottery during the glazing process |
Exploring Different Types Of Glazes Used In Cement Pottery
Glazes are available in a wide variety of colors, textures, and finishes, allowing you to unleash your creativity and add a personal touch to your cement pottery. Here are some popular glaze types used in cement pottery:
- Transparent glaze: This type of glaze allows the natural color and texture of the cement to shine through, giving a glossy, transparent coating.
- Matte glaze: Matte glazes provide a non-shiny finish and a velvety texture, adding sophistication to your cement pottery.
- Crackle glaze: This glaze creates a cracked or crazed effect, adding an intriguing vintage appeal to your cement pottery.
- Raku glaze: Raku glazes are known for their vibrant, metallic finishes, creating eye-catching and dynamic effects on cement pottery.
- Textured glaze: Textured glazes are available in various textures, such as speckled, crystalline, or marbled, adding visual interest and depth to your cement pottery.
Where To Find Quality Glazing Materials For Cement Pottery
When it comes to finding quality glazing materials for your cement pottery, it is important to source them from reputable suppliers. Here are some places where you can find reliable glazing materials:
- Local ceramic supply stores: Many local stores specialize in ceramic and pottery supplies, offering a wide range of glazing materials.
- Online suppliers: Numerous online suppliers cater to the needs of ceramic artists, providing convenient access to quality glazing materials. Shop Ceramic Supplies and Ceramic Art Space are just a few examples of trusted online suppliers.
- Art and craft fairs/exhibitions: Attending art and craft fairs or exhibitions can connect you with talented artists and suppliers who may offer unique and high-quality glazing materials.
By investing in essential tools and exploring different types of glazes used in cement pottery, you can elevate your creations and produce stunning masterpieces.
Remember to source your glazing materials from reputable suppliers for the best results. Now that you have a deeper understanding of the tools and materials required, you are ready to embark on an exciting glazing journey.
Step-by-step Guide To Glazing Cement Pottery
Giving your cement pottery a beautiful glazed finish can significantly enhance its visual appeal. Glazing not only adds a pop of color but also protects the surface of the pottery from moisture and other environmental factors.
In this step-by-step guide, we will walk you through the process of glazing cement pottery, from preparing the piece to achieving an even and smooth glaze application to the proper drying and curing techniques.
Preparing The Cement Pottery Piece For Glazing
Before you start glazing your cement pottery, it’s crucial to prepare the surface properly to ensure optimal adhesion and a flawless glaze finish. Follow these steps:
- Clean the surface: Begin by thoroughly cleaning the cement pottery piece. Remove any dirt, dust, or debris that may affect the glaze application. A soft-bristle brush can be used to gently scrub off any stubborn dirt.
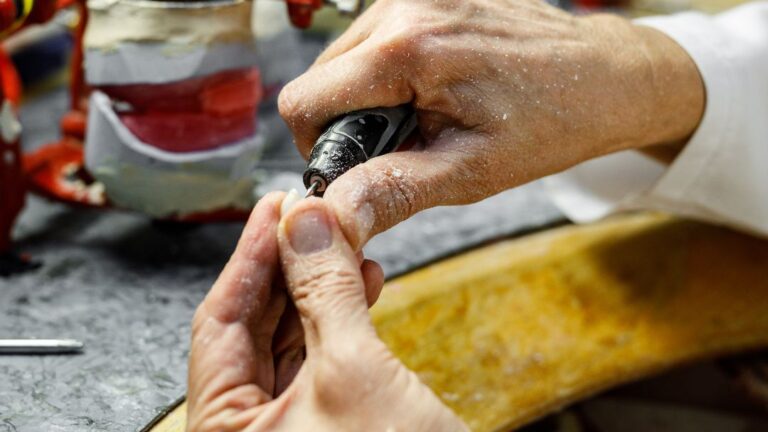
- Smooth out imperfections: Sand down any rough patches or imperfections on the surface using fine-grit sandpaper. This step is vital for achieving a smooth glaze finish.
- Wipe down the pottery: After sanding, wipe the pottery with a damp cloth to remove any dust particles left behind. Ensure the surface is completely dry before proceeding to the next step.
Applying The Glaze Onto The Pottery Surface
Now that the cement pottery piece is prepped, it’s time to apply the glaze. Here’s how:
- Choose the right glaze: Select a glaze that is suitable for cement pottery. Consider factors such as color, texture, and the desired finish. Make sure to follow the manufacturer’s instructions for the specific glaze you choose.
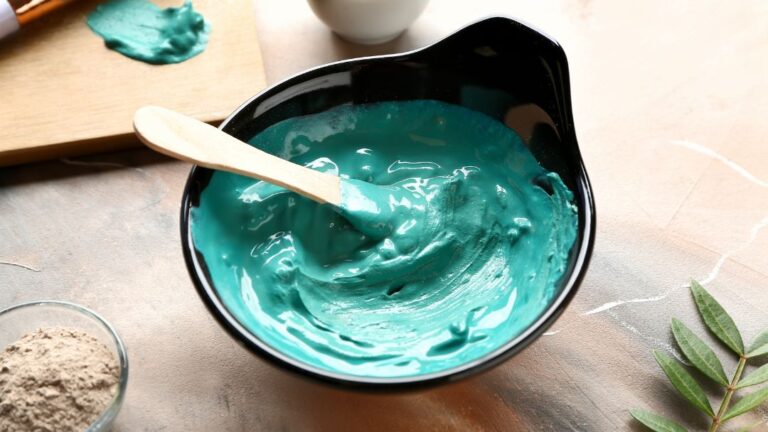
- Stir the glaze: Thoroughly stir the glaze to ensure an even consistency. This step is crucial for avoiding uneven application and achieving a uniform finish.
- Apply the glaze: Use a soft-bristle brush or a foam brush to apply the glaze onto the pottery’s surface. Start from the top and work your way down, ensuring each stroke overlaps slightly for consistent coverage. Apply thin, even coats rather than thick layers, as this will help prevent drips and achieve a more professional finish.
- Allow drying time: Allow the first coat of glaze to dry completely before applying additional layers. Follow the manufacturer’s recommended drying time to avoid smudging or ruining the glaze.
- Repeat the process: Apply additional coats of glaze as desired, allowing each layer to dry before applying the next one. This will help intensify the color and enhance the glaze’s durability.
Tips And Tricks For Achieving Even And Smooth Glaze Application
Here are some tips and tricks to ensure an even and smooth glaze application:
- Work in a well-ventilated area: Glazing can release fumes, so make sure you are in a properly ventilated space to avoid any health concerns.
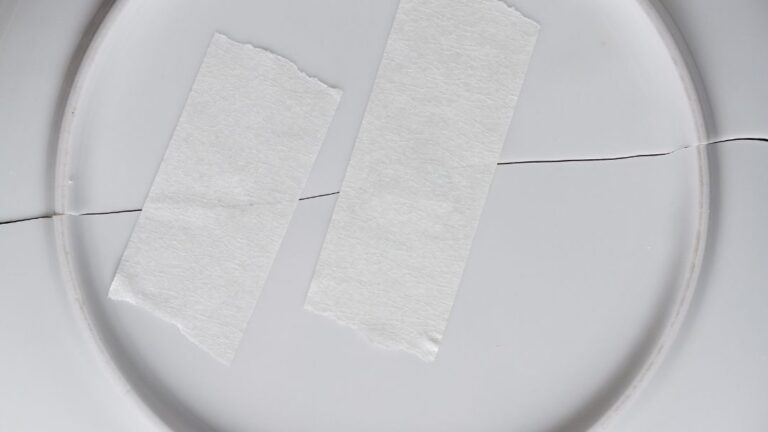
- Use masking tape: If you want to achieve clean lines or protect certain areas from glaze, apply masking tape before starting the glazing process. This will create crisp edges and prevent unwanted glaze applications.
- Practice on a test piece: If you’re unsure about the glaze color or application technique, it’s always a good idea to test it on a small, inconspicuous area or a test piece first.
- Experiment with layering: Layering different glaze colors can create unique effects. Don’t be afraid to experiment and let your creativity shine.
Proper Drying And Curing Techniques For Glazed Cement Pottery
To ensure the glaze on your cement pottery piece is durable and long-lasting, follow these drying and curing techniques:
- Air dry: After applying the final coat of glaze, allow the pottery to air dry for the recommended time specified by the glaze manufacturer. This will ensure the glaze sets properly.
- Cure in a kiln (optional): If you have access to a kiln, you can further enhance the durability of the glaze by firing the pottery. Follow the recommended firing temperature and time for the specific glaze you used.
- Inspect and handle with care: Once the glaze has dried and cured, inspect the pottery for any imperfections or flaws. Handle the piece with care to prevent any accidental damage.
By following this step-by-step guide and incorporating the tips and tricks provided, you’ll be able to glaze your cement pottery with confidence and achieve stunning results that will make your creations truly stand out.
Troubleshooting Common Glazing Issues In Cement Pottery
When it comes to glazing cement pottery, several common issues can arise, leaving you with less-than-desirable results. However, with a little knowledge and some troubleshooting, you can resolve these problems and achieve the perfect glaze for your cement pottery creations. In this section, we will explore some of the most common glazing problems and provide effective solutions to help you overcome them.
Dealing With Glaze Drips, Bubbles, And Uneven Applications
Glaze drips, bubbles, and uneven application are among the most common problems encountered when glazing cement pottery. These issues can detract from the overall appearance and quality of your finished piece. However, by following a few simple steps, you can address these problems effectively.
1. Glaze Drips: Glaze drips occur when the glaze is too thick and doesn’t evenly adhere to the pottery surface. To prevent this, make sure to wipe off any excess glaze before firing the piece. If you notice any drips during firing, carefully remove them with a damp sponge or scrape them off with a ceramic tool.
2. Bubbles: Bubbles can form in the glaze during firing, resulting in an uneven and undesirable surface texture. To avoid this issue, ensure that the glaze is thoroughly mixed before applying it. Additionally, apply thin layers of glaze to the pottery, allowing each coat to dry completely before applying the next. This will help minimize the likelihood of bubbles forming.
3. Uneven Application: Uneven application of glaze can lead to inconsistent color and texture on your cement pottery. To achieve a smooth and uniform finish, make sure to apply the glaze evenly to the entire surface of the piece. Consider using a brush or sponge for precise and controlled application. Take your time and apply multiple thin coats, allowing each coat to dry before applying the next, to ensure an even distribution of glaze.
Preventing Glaze Flaking And Chipping In Cement Pottery
Glaze flaking and chipping can be frustrating when it comes to cement pottery. However, by taking the necessary precautions, you can prevent these issues and maintain the longevity of your glazed pieces.
1. Proper Surface Preparation: Before applying the glaze, make sure that the surface of your cement pottery is clean and free from any dust, dirt, or residue. This will ensure better adhesion of the glaze to the surface and reduce the likelihood of flaking or chipping.
2. Compatible Glaze: Ensure that the glaze you choose is compatible with cement pottery. Some glazes may not adhere well to cement surfaces, resulting in flaking and chipping. Consult the manufacturer’s instructions or test the glaze on a small section of the pottery before applying it to the entire piece.
3. Proper Firing: Follow the recommended firing schedule for your glaze and cement pottery. Incorrect firing temperatures or durations can cause the glaze to become brittle, leading to flaking and chipping. Proper firing ensures that the glaze bonds well with the pottery surface, resulting in a durable finish.
By addressing common glazing problems and taking preventive measures, you can achieve a flawless glaze on your cement pottery. Troubleshooting issues such as glaze drips, bubbles, uneven application, flaking, and chipping will help you create stunning and long-lasting cement pottery pieces that are sure to impress.
Advanced Glazing Techniques For Cement Pottery
One of the most exciting aspects of glazing cement pottery is the ability to create unique patterns and designs. With the right techniques, you can transform a plain cement pot into a stunning piece of art. Whether you prefer geometric shapes, floral designs, or abstract patterns, there are various methods you can use to achieve your desired look.
To create intricate patterns, you can:
- Use tape or stencils to mask off specific areas before applying the glaze.
- Experiment with different brush strokes to create texture and movement.
- Use the sgraffito technique to scratch away the glaze and reveal the base color underneath.
By combining these techniques, you can create truly unique and eye-catching patterns on your cement pottery.
Layering And Blending Different Glaze Colors For A Stunning Effect
Layering and blending different glaze colors can take your cement pottery to the next level. Instead of using a single glaze color, you can create depth and visual interest by applying multiple layers of glaze.
To blend different glaze colors:
- Start by applying a base coat of glaze on your pottery.
- Once the base coat is dry, apply a second glaze color on top.
- Use a soft brush or sponge to blend the colors together for a smooth transition.
This layering and blending technique allows you to create stunning effects such as ombre, marbling, or gradient color transitions. Experiment with different color combinations to find the perfect combination for your cement pottery.
Using Texture And Surface Decoration Techniques In Glaze Application
Adding texture and surface decorations to your glaze application can elevate the visual impact of your cement pottery. By incorporating texture, you can create a tactile experience for both the eyes and hands.
Here are some techniques to try:
| Technique | Description |
|---|---|
| Sponging | Use a sponge dipped in glaze to create a stippled or mottled effect. |
| Combing | Drag a comb through the wet glaze to create parallel lines or wave patterns. |
| Impressing | Press textured objects onto the wet glaze to create imprints. |
By incorporating these texture and decoration techniques, you can add depth and visual interest to your cement pottery.
Experimental Approaches To Glazing Cement Pottery
Pushing the boundaries of traditional glazing techniques can lead to exciting and unexpected results. To truly explore the possibilities, consider taking an experimental approach to glazing cement pottery.
Some experimental techniques to try include:
- Dipping the pottery into multiple glazes to create a layered effect.
- Mixing glazes with different materials such as sand, crushed glass, or metallic flakes for added texture and shine.
- Use unconventional tools like sponges, feathers, or even your fingers to apply the glaze.
While experimenting, keep in mind that not every attempt will be a success. Embrace the process of trial and error, and don’t be afraid to explore new possibilities.
Conclusion
To sum up, glazing cement pottery is a vital step in the pottery-making process. By following the steps mentioned in this blog post, you can achieve beautiful and durable glazed pottery pieces. Remember to choose the right type of glaze, prepare the surface properly, and apply the glaze with care.
With practice and patience, you can create stunning glazed cement pottery that will be admired for years to come. Happy glazing!