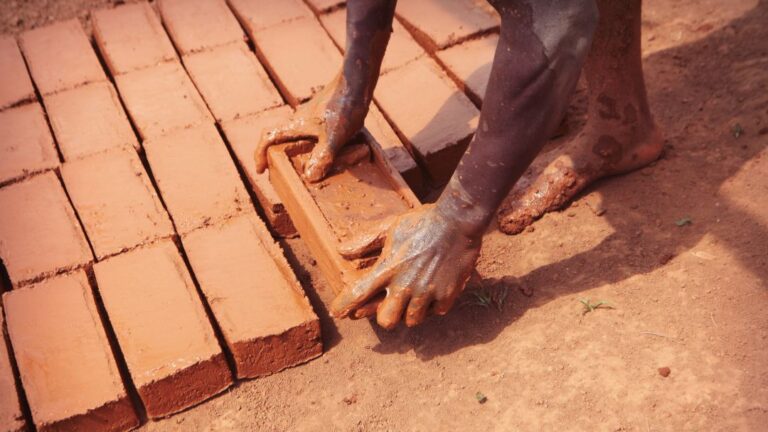
How to Easily Fix Crazing in Pottery: Proven Techniques
To fix crazing in pottery, apply a layer of clear gloss glaze over the affected areas and fire it in a kiln at the appropriate temperature. Crazing in pottery occurs when the glaze and clay bodies contract at different rates, causing small cracks on the surface.
Crazing not only affects the aesthetics of the pottery but also compromises its structural integrity. By reapplying a clear gloss glaze and firing, the cracks can be filled and the pottery restored to its original condition.
With the proper techniques, you can easily fix crazing in pottery and preserve the quality and appearance of your ceramic pieces.
Understanding Crazing: What Is It And Why Does It Happen?
Crazing is a common issue encountered in pottery, often leading to frustration for both hobbyists and professional potters alike. Understanding the causes and effects of crazing is crucial in order to fix and prevent this problem in your pottery.
Let’s delve deeper into the definition, causes, and impact of crazing.
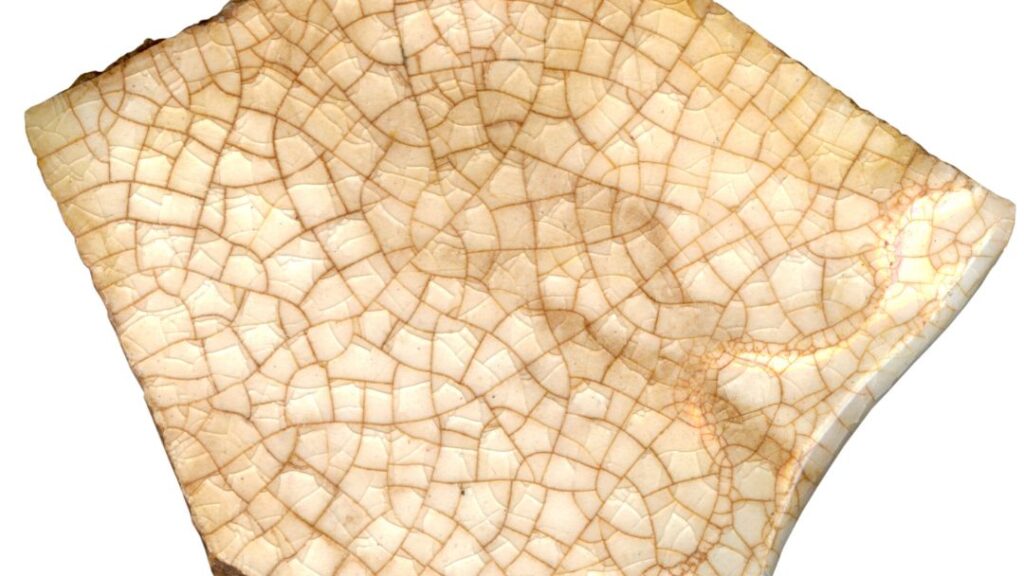
Definition Of Crazing In Pottery
Crazing refers to the occurrence of fine cracks or lines that form on the glaze surface of pottery, resembling a delicate spiderweb pattern. These cracks do not extend through the entire thickness of the pottery, only affecting the glazed surface.
Causes Of Crazing In Pottery
Crazing can arise due to various factors, including:
- Thermal mismatch: When the clay body and glaze have different coefficients of thermal expansion, they expand and contract at different rates during cooling, leading to stress and subsequent cracking.
- Inappropriate glaze fit: If the glaze is not properly formulated or applied, it may not fit the clay body properly, resulting in crazing.
- Improper firing temperature: Firing pottery at an incorrect temperature can cause the glaze to contract inadequately, resulting in crazing.
- Insufficient kiln ventilation: Poor kiln ventilation can cause gases to be trapped between the glaze and clay body, leading to crazing.
- Glaze formulation: Incorrect ratios of ingredients in the glaze recipe can also contribute to crazing.
Impact Of Crazing On The Appearance And Functionality Of Pottery
Crazing can negatively impact both the appearance and functionality of pottery. Some of the notable effects include:
- Aesthetic compromise: Crazing can detract from the overall visual appeal of pottery, as the intricate patterns of cracks may be perceived as flaws rather than intentional design.
- Reduced durability: The fine cracks weaken the glaze layer, making it more susceptible to chipping, cracking, and staining.
- Hygiene concerns: Crazing can provide a breeding ground for bacteria and make it more difficult to clean tableware effectively.
- Imperfections in glaze: Crazing can impede the glaze’s ability to create a smooth, glossy finish, resulting in a less desirable texture.
By understanding the definition, causes, and impact of crazing in pottery, you can take proactive steps to address this issue and create high-quality, durable pottery pieces that are both visually appealing and functional.

Visual Inspection
Crazing in pottery can be fixed through visual inspection. By carefully examining the surface, you can identify the areas affected by the fine cracks and take appropriate measures to repair them.
Examining And Identifying Crazing In Pottery
Crazing in pottery refers to the network of thin cracks that appear on the glaze surface over time. These cracks can be unsightly and may affect the overall aesthetic appeal of the pottery. In this section, we will explore how to visually inspect the pottery to identify crazing, assess its severity, and determine if the pottery is salvageable.
Assessing The Severity Of The Crazing
When examining crazing in pottery, it is essential to assess the severity of the cracks to determine the appropriate course of action. Here are some key factors to consider:
- Density of the cracks: Take note of how closely spaced the cracks are. Are they sparse or covering a large area of the pottery surface?
- Length of the cracks: Evaluate the size of the cracks. Are they short and minimal or long and extensive?
- Depth of the cracks: Determine if the cracks are superficial, limited to just the glaze layer, or if they extend deeper into the body of the pottery.
- Cracks reaching through the glaze: Check if the cracks extend through the glaze and reach the underlying body of the pottery.
Determining If The Pottery Is Salvageable
Once you have assessed the severity of the crazing, you can determine if the pottery is salvageable. Consider the following factors:
- Functional use: If the pottery is intended for decorative purposes only, slight crazing may not be a concern. However, if the pottery is intended for functional use, such as holding liquids, extensive crazing may compromise its usability.
- Age and collectibility: Evaluate the age and collectibility of the pottery. In some cases, the presence of crazing can enhance its value, particularly if it is an antique or vintage piece.
- Stability and structural integrity: Examine if the pottery still maintains its stability despite the crazing. If the cracks are causing the piece to feel weak or fragile, it may not be worth salvaging.
Ultimately, the decision to salvage pottery with crazing depends on personal preference and the specific circumstances of each piece. An experienced potter or conservator can help guide you through the process and offer advice on the best course of action.
In the next section, we will explore various methods to repair and prevent further crazing in pottery.
Factors Contributing To Crazing
Crazing in pottery can be caused by various factors such as temperature changes, improper glaze application, or clay composition. To fix crazing, you can try reglazing the pottery, adjusting kiln firing temperatures, or using a different type of clay.
Moisture And Humidity Levels
Moisture and humidity levels play a significant role in the occurrence of crazing in pottery. Here are some factors to consider:
- Rapid drying: When pottery pieces dry too quickly, it can cause stress on the glaze surface, leading to crazing. This can happen if the clay is not properly dried or if the drying environment has low humidity levels.
- High humidity during firing: Excessive moisture in the pottery during firing can also contribute to crazing. The trapped moisture expands as it turns into steam, creating pressure on the glaze layer and causing cracks to form.
Glaze Composition And Application
The composition and application of the glaze can greatly impact the likelihood of crazing. Here are some key points:
- Thermal expansion mismatch: A significant difference in the rate of thermal expansion between the glaze and the underlying body of the pottery can lead to crazing. If the glaze expands and contracts at a different rate than the clay body, it can cause stress and cracking.
- Incompatible glazes: Some glazes are inherently prone to crazing due to their composition. Certain fluxes and high levels of certain oxides can increase the risk. It is important to choose a glaze that is compatible with the specific clay body being used.
- Uneven application: Uneven or thick application of glaze can create areas of varying thickness, which may cause crazing. Thick glaze application takes longer to dry and might lead to higher risks of crazing.
Firing Techniques And Temperatures
The firing process is critical when it comes to preventing crazing in pottery. Consider the following factors:
- Cooling rate: Rapid cooling after firing can induce stress on the glaze, leading to crazing. It is important to control the cooling rate to allow the pottery to adjust to temperature changes gradually.
- Overfiring or underfiring: Firing pottery at incorrect temperatures can increase the likelihood of crazing. Overfiring can cause the glaze to melt excessively, while underfiring can result in insufficient vitrification, both of which can lead to crazing.
- Firing atmosphere: The atmosphere in the kiln during firing can impact the glaze and clay body, affecting the potential for crazing. Factors such as oxidizing or reducing conditions can influence the final outcome.
By considering these factors related to moisture and humidity levels, glaze composition and application, and firing techniques and temperatures, you can take proactive steps to minimize or fix crazing in your pottery. Remember to create a balance between these variables to achieve optimal results.
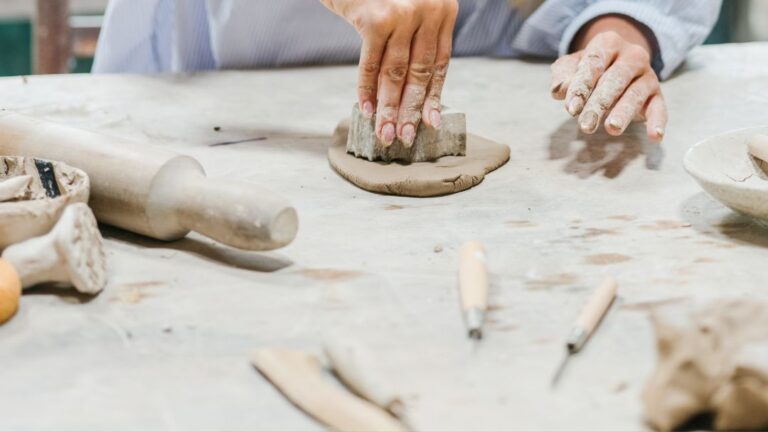
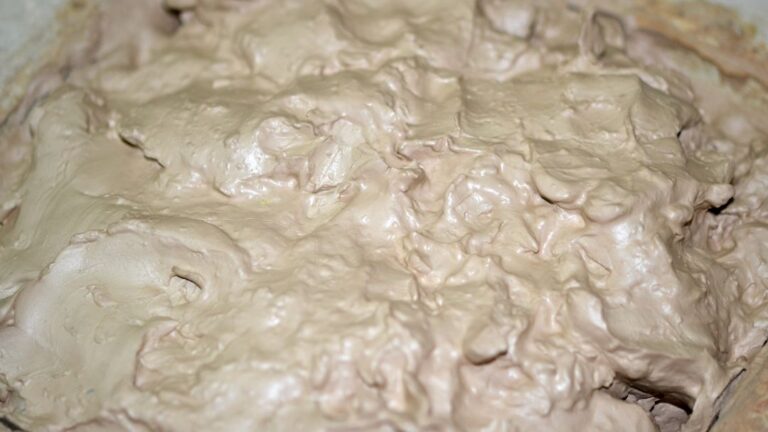
Cleaning And Preparation
Clean and prepare your pottery to fix crazing with these simple steps. Remove any dirt or debris from the surface and apply a suitable glaze to repair the craze lines. Keep your pottery looking perfect with proper cleaning and preparation techniques.
Cleaning The Pottery Surface
Cleaning the pottery surface is an essential step in fixing crazing. This process involves removing any residual glaze or moisture from the pottery to ensure a smooth and even surface for the repair process. Here’s how you can effectively clean the pottery surface:
- Gently wipe the pottery with a soft, dry cloth to remove any loose debris or dirt.
- If there is any residual glaze on the surface, you can use a glaze remover specifically designed for pottery. Apply the remover according to the manufacturer’s instructions and carefully scrape off the glaze using a plastic tool.
- In case the pottery has been exposed to moisture, allow it to dry completely before proceeding with any repairs. You can place the pottery in a warm and dry area to speed up the drying process.
- For stubborn stains or residue, you can create a mild cleaning solution by mixing warm water with a gentle detergent. Dip a soft sponge or cloth into the solution and gently scrub the surface, taking care not to apply excessive pressure that could further damage the pottery.
- Rinse the pottery thoroughly with clean water to remove any traces of detergent or cleaning solution.
- After cleaning, allow the pottery to air dry completely before moving on to the next step.
Ensuring a smooth and even surface for the repair process:
To effectively fix crazing in pottery, it’s crucial to have a smooth and even surface for the repair materials to adhere to. Here are some steps to ensure the surface is prepared properly:
- Inspect the pottery for any rough or uneven areas. Use your fingers to feel for any imperfections or raised edges.
- If there are any rough spots, you can gently sand them down using fine-grit sandpaper. Be careful not to apply too much pressure or sand too aggressively, as this could cause further damage.
- After sanding, wipe away any dust or debris using a soft cloth or brush. Ensure that the surface is clean and free from any particles that could interfere with the repair process.
- If the pottery has any deep cracks or holes, you may need to fill them with a suitable clay or filler material. Follow the manufacturer’s instructions for the specific product you choose, and ensure that it dries and sets properly before proceeding with the repair.
By focusing on cleaning the pottery surface and ensuring a smooth and even surface for the repair process, you can effectively fix crazing and restore your pottery to its original beauty.
Filling Crazing Lines
Learn how to fix crazing in pottery by filling crazing lines. Follow these effective techniques to repair the cracks and restore the beauty of your ceramic artwork.
Pottery is a delicate art form that requires attention to detail and care. One common issue that can arise with pottery is crazing, which refers to the formation of fine cracks on the glazed surface. If you have a piece of pottery with crazing lines, you may be wondering how to fix it.
In this section, we will focus on filling the crazing lines to restore the pottery’s appearance. Here’s how you can go about it:
Choosing The Right Filler Material
- Epoxy resin: This versatile filler material is commonly used in pottery repairs. It dries clear and provides a strong bond.
- Acrylic paint: If you’re looking for an option with a wide range of color choices, acrylic paint can be mixed with a suitable adhesive to fill the crazing lines.
Applying The Filler To The Crazing Lines
- Clean the pottery: Begin by cleaning the pottery surface thoroughly to remove any dirt or debris. This ensures better adhesion of the filler material.
- Mix the filler: Prepare the filler material according to the manufacturer’s instructions. If you’re using epoxy resin, make sure to mix the resin and hardener in the recommended ratio.
- Fill the crazing lines: Using a fine brush or applicator, carefully apply the filler material along the length of the crazing lines. Ensure that the filler is evenly distributed, filling the cracks completely.
Smoothing And Blending The Filler For A Seamless Look
- Let the filler dry: Allow the filler material to dry completely. This can take several hours, so be patient and avoid touching the filled areas during this time.
- Sand the excess filler: Gently sand the filled areas using fine-grit sandpaper. This helps to level the filled surface and remove any excess filler material.
- Blend the color: If you use acrylic paint as a filler, use small amounts of paint and a fine brush to blend the color of the filled areas with the surrounding pottery surface. Take your time to achieve a seamless look.
By carefully selecting the right filler material, applying it with precision, and smoothing and blending it effectively, you can restore pottery with crazing lines to its former glory. Remember to take your time and follow the instructions diligently for the best results.
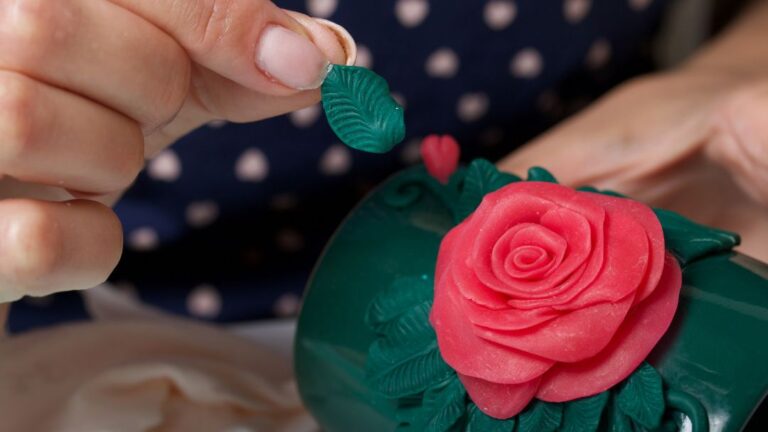
Glaze Repair
Discover effective techniques for fixing crazing in pottery glazes. Learn how to repair and restore the beauty of your ceramic pieces with these expert tips.
When it comes to fixing crazing in pottery, glaze repair is an important step in restoring the beauty and functionality of your piece. Whether you’re a seasoned potter or a beginner, being able to repair the glaze on your pottery can save you time and money.
Follow these steps to seamlessly match the glaze, apply it to the repaired areas, and achieve a consistent finish through firing.
Selecting A Matching Glaze
To ensure a seamless repair, it’s crucial to select a glaze that closely matches the original glaze of your pottery. Here’s how you can find the perfect match:
- Start by examining the color, texture, and finish of the existing glaze on your piece.
- Use a color wheel or consult a glaze chart to identify glazes with similar hues.
- Consider the firing temperature and type of glaze (such as matte or glossy) used in the original piece.
- Test the glaze on a small inconspicuous area of the pottery to verify if it matches before applying it to the repaired areas.
Applying The Glaze To The Repaired Areas
Applying the glaze to the repaired areas requires precision and attention to detail. Follow these steps for a successful glaze repair:
- Clean the repaired area thoroughly by removing any dust, debris, or old glaze.
- Use a small brush specifically designed for glaze application to carefully apply a thin layer of the matching glaze onto the repaired area.
- Ensure that the glaze covers the entire repaired surface evenly.
- Allow the glaze to dry completely before proceeding to the next step.
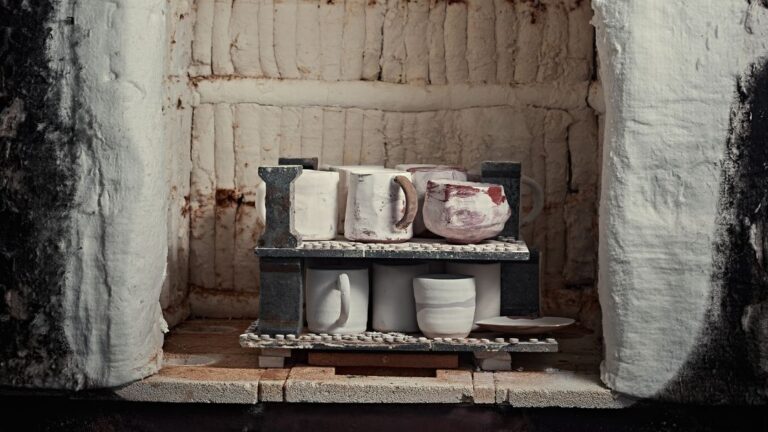
Firing The Pottery To Achieve A Consistent Finish
Firing the pottery is the final step in the glaze repair process and is essential for achieving a consistent finish. Follow these guidelines for successful firing:
- Place the pottery on a kiln shelf, making sure it is secure and properly positioned.
- Follow the recommended firing schedule for the type of glaze used, including temperature and duration.
- Monitor the kiln throughout the firing process to ensure the temperature remains consistent.
- Once the firing is complete, allow the pottery to cool gradually inside the kiln.
- Remove the now-repaired pottery from the kiln and inspect the glaze to ensure it has fused properly and matches the surrounding areas.
By carefully selecting a matching glaze, applying it to the repaired areas, and firing the pottery correctly, you can fix crazing and achieve a consistent finish. With these steps, you’ll be able to enjoy your pottery once again, knowing that its natural beauty has been restored.
Surface Treatment And Polishing
Crazing in pottery can be a frustrating issue for artists and collectors alike. Thankfully, there are techniques to fix this problem and restore the original beauty of the piece. One essential step in the process is surface treatment and polishing.
In this section, we will explore two key methods to achieve a smooth and glossy finish: sanding the repaired areas and buffing and polishing the pottery surface.
Sanding The Repaired Areas
- Begin by identifying the areas that require repair and gently sand them using fine-grit sandpaper.
- Take care to sand in a consistent and even manner, ensuring that the repaired areas blend seamlessly with the surrounding pottery.
- Use light pressure and circular motions to gradually smooth out the surface, removing any imperfections or roughness.
- After sanding, clean the pottery thoroughly to remove any dust or debris.
Buffing And Polishing The Pottery Surface
- Apply a ceramic glaze or a specialized polishing compound to the entire pottery surface using a soft cloth or sponge.
- Gently buff the surface in circular motions, exerting light pressure to achieve an even sheen.
- Continue buffing until the desired level of glossiness is attained. Remember to be patient and take your time.
- Once the polishing is complete, allow the pottery to dry completely before handling or displaying it.
Achieving a smooth and glossy finish is crucial to the overall aesthetics of the repaired pottery. By following these surface treatment and polishing techniques, you can bring back the luster and charm of your beloved pieces. Experiment with different strategies and materials to find the method that works best for your specific pottery and enjoy the satisfaction of seeing your creations restored to their former glory.
Proper Glaze Application
Glaze application is a crucial step in pottery that can greatly impact the final appearance and quality of your piece. To achieve the best results and prevent crazing, it is important to follow proper glaze application techniques.
Here are some key guidelines to keep in mind:
Ensuring Even And Consistent Glaze Thickness
- Apply glaze in thin layers: Start with a thin coat of glaze and gradually build up layers as needed. This helps to ensure even coverage and minimizes the risk of crazing.
- Use a soft brush or sponge: Apply glaze using a soft brush or sponge to achieve a smooth and even application. Avoid using brushes with stiff bristles, as they can leave brush marks or uneven glaze thickness.
- Pay attention to edges and corners: Take extra care to apply an even layer of glaze around edges and corners to prevent areas of thicker or thinner glaze, which can lead to crazing.
Allowing Proper Drying And Curing Time Before Firing
- Let the glaze dry completely: After applying the glaze, allow it to dry completely before firing. This ensures that the glaze is set properly and reduces the risk of crazing.
- Follow recommended drying times: Different glazes may have different drying times, so be sure to follow the instructions provided by the manufacturer. Skipping or rushing the drying process can increase the likelihood of crazing.
- Consider the thickness of glaze layers: Thicker layers of glaze may require more drying time to ensure complete curing. Be patient and allow enough time for the glaze to dry thoroughly.
Remember, proper glaze application is essential to prevent crazing in your pottery. By following these guidelines for even and consistent glaze thickness and allowing adequate drying and curing time before firing, you can help ensure beautiful and durable pottery pieces.
Firing Techniques
Fixing crazing in pottery requires understanding different firing techniques. By experimenting with firing temperatures, cooling rates, and glaze recipes, you can effectively eliminate or reduce crazing in your pottery pieces.
Understanding The Ideal Firing Temperature For The Pottery Type
To fix crazing in pottery, it’s essential to have a good understanding of the ideal firing temperature for the specific type of pottery you’re working with. Here are a few key points to keep in mind:
- Different types of pottery require different firing temperatures. The ideal firing temperature depends on factors such as the type of clay used, the glaze applied, and the final desired outcome of the piece.
- Low firing temperatures, typically between 900 to 1100 degrees Celsius, are suitable for earthenware pottery. This type of pottery is known for its porous nature and is often used for decorative and functional pieces.
- Stoneware pottery, which is more durable and less porous, requires a higher firing temperature. The ideal range for stoneware is typically between 1200 to 1300 degrees Celsius.
- Porcelain, known for its translucent and delicate appearance, necessitates the highest firing temperatures. Porcelain pottery is typically fired at temperatures ranging from 1300 to 1400 degrees Celsius.
Employing Controlled Cooling Techniques To Reduce Stress
After firing the pottery and achieving the ideal firing temperature, the next crucial step is to employ controlled cooling techniques to reduce stress and minimize the occurrence of crazing. Here’s what you need to know:
- Gradual cooling: Rapid temperature changes can cause stress and increase the likelihood of crazing. To prevent this, it’s important to cool the pottery gradually. This can be achieved by turning off the kiln and allowing it to cool naturally to room temperature.
- Holding temperature: Another technique is to hold the pottery at a specific temperature during the cooling process. This is especially useful for pieces that are more prone to crazing. By holding the temperature, you’re allowing the pottery to relax and minimize the stress that could lead to cracks and crazing.
- Venting the kiln: Proper ventilation is essential during the cooling process as it helps to equalize the temperature and prevent sudden changes. Opening the kiln’s flue or propping the lid slightly can aid in the controlled cooling process.
Remember, when addressing crazing in pottery, achieving the ideal firing temperature based on the pottery type and employing controlled cooling techniques are critical steps in obtaining successful and craze-free results.
Handling And Storage
Learn how to fix crazing in pottery with these practical tips for handling and storage. Prevent unsightly cracks in your ceramic masterpiece and maintain its integrity for years to come.
Properly Handling And Storing Pottery To Avoid Physical Stress
Pottery is a delicate and beautiful form of art that requires proper handling and storage to ensure its longevity and prevent any damage. Whether you are a pottery enthusiast or a professional potter, it is crucial to follow the right techniques for handling and storing pottery.
By doing so, you can prevent issues such as crazing, which refers to the development of fine, spiderweb-like cracks on the glaze surface of pottery. Here are some tips on how to handle and store pottery to avoid physical stress:
- Handle with care: When handling pottery, always remember to be gentle and avoid applying excessive pressure or force. Treat each piece as a fragile artwork and avoid gripping or squeezing it tightly. Instead, use the following techniques to ensure safe handling:
- Hold the pottery with clean hands and avoid touching the glazed surface as much as possible.
- Support larger pieces of pottery from the bottom or sides to distribute the weight evenly.
- Use both hands when handling larger or more delicate pieces to provide better balance and stability.
- Provide proper support during storage: Storing pottery correctly is just as important as handling it with care. Improper storage can lead to physical stress on the pottery, causing undesirable effects such as crazing. Follow these guidelines to ensure safe storage:
- Place pottery on a sturdy and level surface to prevent it from toppling over.
- Avoid stacking pottery on top of each other, as the weight can lead to cracking.
- Use soft materials such as clean cloth or acid-free tissue paper to cushion and separate pieces during storage.
- If you need to stack pottery, place soft padding materials between each piece to prevent direct contact and potential damage.
- Protect during transportation: When transporting pottery, taking the necessary precautions is crucial to avoid any mishaps or accidents during transit. Here are some tips to protect your pottery during transportation:
- Wrap each piece individually with bubble wrap or foam to provide cushioning against shocks or vibrations.
- Use sturdy boxes that are specifically designed for transporting fragile items.
- Fill any empty spaces in the box with additional padding material, such as packing peanuts or crumpled paper, to prevent movement during transit.
- Clearly label the box as fragile and provide any handling instructions to ensure proper care.
By following these proper handling and storage techniques, you can ensure that your pottery remains in excellent condition and minimize the risk of crazing and other damage. Remember, taking the time to handle and store your pottery properly is an investment in its long-term preservation and enjoyment.
Conclusion
Fixing crazing in pottery requires a combination of knowledge and skill. By understanding the causes of crazing and implementing the appropriate techniques, you can effectively address this common issue in pottery. Remember to start by evaluating the clay body and glaze compatibility, making necessary adjustments if needed.
Slow cooling the pottery during the firing process can also help prevent crazing. If crazing does occur, you can attempt to fix it by reglazing or refiring the piece, being mindful of temperature and timing. Regular maintenance and proper handling of the pottery can further minimize the risk of crazing.
By following these guidelines, you can maintain the integrity and beauty of your pottery creations for years to come. Let your creativity shine through, confident in your ability to fix and prevent crazing in your pottery.